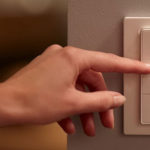
A two-gang switch is not just a convenient way to select the level of illumination in an apartment, it plays an important role in energy saving.
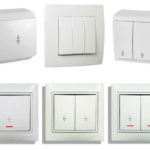
According to the principle of control, switches are available both with classic keys, which are pressed from top to bottom and vice versa, and with touch buttons. In addition, there are contactless devices.
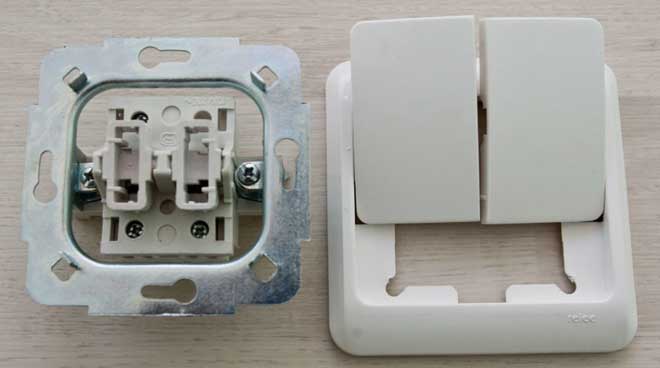
The design is a hybrid of two single-gang switches with a single cable entry system and one housing instead of two.
Content
Advantages of double switches
The double switch is convenient as follows:
- In the cramped conditions of a small apartment, a two-gang switch is simply indispensable, because there is not always a free section of the wall in order to put several devices side by side.
- Can combine any two lighting groups.The cable of both groups can come from one lighting device, or from different ones, for example, from a floor lamp and a chandelier.
- Along with single switches, it is carried out both in the classic and in the walk-through version, which is convenient if there is a long corridor in the premises, requiring the ability to turn the light on and off at its different ends.
- It can be made in a waterproof version, as well as with an IP protection level, which gives advantages when placed outdoors, for example, on the porch of a private house. One lighting group, which he manages, in this case is responsible, for example, for the light above the front door, and the second - for outdoor lighting in the backyard.
- Although a two-button switch is slightly more expensive than a single one, its installation is more profitable, since there is no need to buy two devices and pay for double installation.
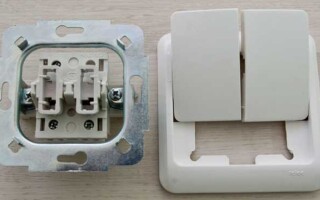
Switch device with two keys
The two-gang switch differs in only one thing - 2 cables going to the lamps are connected to the terminals instead of one, and the phase from the junction box comes to the contact one, as in the case of a single-gang switch.
This process is considered simple, since for its implementation you only need pliers, with which you will remove the rubber sheath from the wire, that is, thereby stripping it for further manipulation. In order to determine which group of lighting will be switched on from each cable, and not to confuse the composition of the bulbs in one combination, the box with the keys should be installed in the working position only after temporarily applying voltage to the two-gang switch and testing its performance.
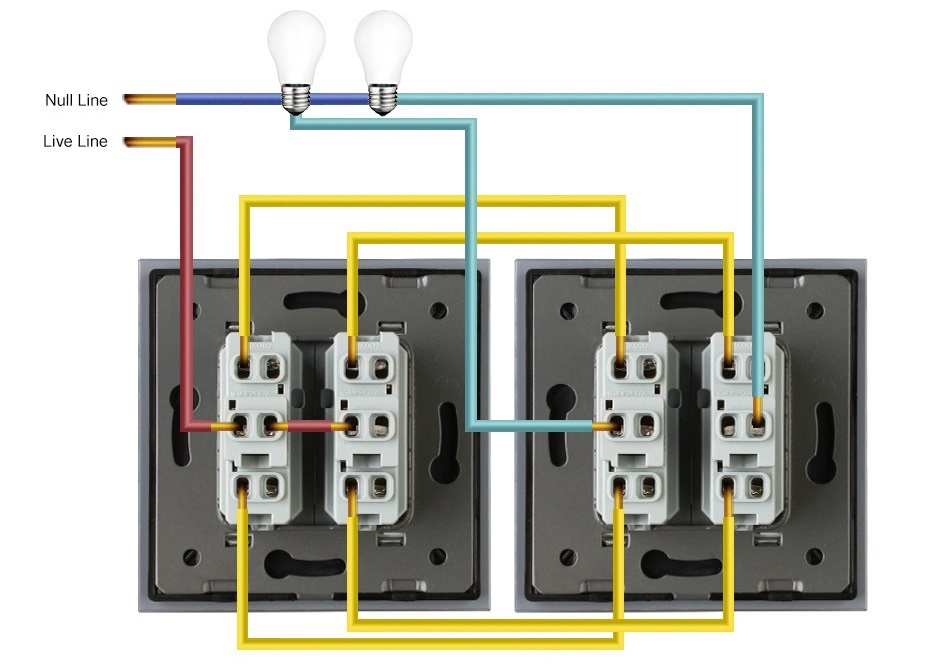
Wiring diagram for two bulbs
The connection diagram of a two-gang switch is extremely simple and, subject to safety requirements and the presence of minimal tools and consumables, can be performed not only by a professional, but by any person. The phase conductor from the power supply panel through the junction box goes to the terminals on the switch.
Inside the device itself there are wires leading to the output terminals, distributing power to two components, each of which forms a separate electrical circuit, which is closed or opened by one of the switch keys. Two cables are connected to the outlet terminals, each of which, by hidden or open laying in a wall or ceiling, goes to a lighting device or to two different devices.
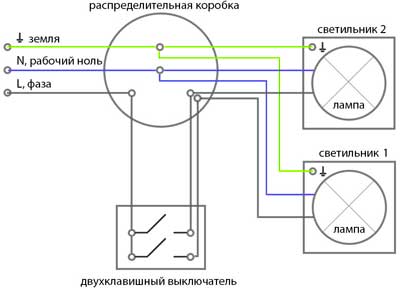
This device must have in its design an internal junction box for powering various light bulbs, to which the cables coming from the two-key device are connected. Thus, using the example of a lamp with two light bulbs, when connected correctly, by pressing one key, the first light will light up, and the second light on the other. Both keys pressed close the circuit on two wires, and 2 bulbs light up at once. The neutral cable goes directly from the junction box to the lighting fixture, providing grounding.
Installation of electrical wires
The installation of a two-gang switch is carried out in the following steps:
- The main rule of electrical work is to perform all manipulations exclusively with the power turned off in order to avoid consequences in the event of a short circuit or human contact with bare wires. When working, it is always necessary to use screwdrivers, pliers, wire cutters and other tools only with dielectric handles to prevent electric shock. Work is recommended to be done with rubber gloves.
- How to install a double light switch: first of all, you need to choose the most comfortable place for inserting the switch into the wall for operation, after which, using a crown drill, make a recess in the wall sufficient for installing a plastic box for the switch. Then wires are brought to the box with a margin in length in order to make a reliable connection.
- It is advisable to determine in advance the position of the terminals on the circuit breaker itself, so that the phase conductor and the PE conductor, which ensures uninterrupted operation of the grounding of the device, as well as the grounding points, are in the right areas of the box. To be able to pull cables after connecting the device, it is recommended that all gaskets be made in corrugations with a diameter of at least twice the cross section of cables in insulation. Pay special attention to grounding the device.
- How to connect a two-gang light switch: the outlets of the cables are stripped of insulation at the ends, and if the wire is stranded, a twist is arranged from its bare ends. It is recommended to use wires with copper cores with minimal resistance. Don't forget to connect the PE conductor.Then, using the built-in two-pin terminal device inside the switch, connect the phase and neutral cables.
- You should carefully consider the connection diagram, draw it on paper in advance or read the finished one in the instructions for connecting and installing the switch on the back of the device, if one is shown there. Try to prevent the formation of a long bare section after connecting the cables to the switch terminals, and if any are found, disconnect the wire and cut it so that when reconnecting the length of the bare section is minimal.
- It will be important to track the entire route of the cable line from the switchboard with the machine to the junction box, then to the switch and to the lighting fixture. The cable must have the same cross-section, number and type of cores throughout its entire length. Otherwise, a section of wire with different characteristics should be replaced, since the consequences of its operation may be unpredictable. It is desirable to carry out sections of the circuit from connection to connection with a single piece of wire without connections along the length.
- Then you should apply voltage and carefully, observing safety precautions, test the switched off device. When performing this stage of work, it is recommended to use safety glasses to prevent possible sparks from entering the eyes in the event of a short circuit, which can occur when the supply cables are incorrectly selected and the phase cable is connected to the ground cable. In this case, you need to turn off the voltage again as soon as possible, if the machine in the shield did not work, and sort out the circuit by connecting the cables in the correct order.
- Before making a connection by non-professionals, it is best to refer to the specialized literature and study the features of the types of cores in the cable, since each of them has its own color according to the function performed. In this case, the terminals are always arranged in such a way that the supply cable is inserted on one side of the switch, and the outgoing cable is on the opposite side.
- Press the switch with cables into the box and wedge it with special screws in the body of the device. If the wire outlets are too long and interfere, you should not bend them, as this can lead to damage and even burnout of the cables during operation. The best thing here is to disconnect the wires, cut them, strip them again from insulation and connect them. These screws are made in a hidden version, so it is necessary to remove the plastic tips of the switch keys, which are held on by latches.
- If attempts to remove the keycaps do not give the desired result, it is better to study the installation instructions to prevent damage to the device. After dismantling the tips of the keys, 2 screws are clearly visible, which are located on the sides of the keys and tightening which securely fixes the device in the wall. After wedging the device and checking its immobility in the box, the key tips are installed in place. The two-gang switch is ready for operation.
The first hours after the start of operation, in order to avoid unpleasant consequences, it is recommended to monitor the heating of the machine responsible for the connected lighting device, and if it overheats, take measures to replace it.
It is important that the connections in the correct sequence are made not only inside the device, but also in the junction box and in the lighting fixture itself, since all links in the electrical circuit are inextricably linked to each other.
The connection of all cables should be carried out only after a thorough stripping of the ends from the insulation, the twisting of the two wires should be neat, uniform and tight, and the insulation should cover all the metal parts of the wires. It is unacceptable that the bare ends of the wires, even over time, could touch each other. This will inevitably lead to a short circuit and the need to change the wire, which is problematic to do in the conditions of the repair and finishing work performed.
Despite the relative ease of installation and connection of the switch, all work is best done with the involvement of a professional electrician, this guarantees safe and long-term operation of the device. Do not use old, damaged, bent wires for connection. Even if insulation damage is detected on a new wire, it is advisable not to use this section in the circuit.
Similar articles: