Laying an infrared warm floor under the tiles in residential or utility rooms, you can solve the issue of heating not only in an apartment or house. Thin film elements allow you to mount the system without raising the floor and pouring concrete screed.
Content
Is it possible to lay the film floor under the tiles?
When buying thin heating elements, the following questions often arise:
- what kind of IR film to lay;
- laying infrared floor heating under the tiles seems unrealistic or too complicated.
Builders use 2 easy and quick installation methods:
- dry, using GVL or glass-magnesite sheet (SML);
- wet, i.e. a thin concrete screed.
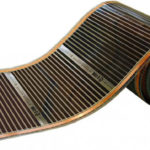
To install an infrared floor heating under porcelain stoneware or tiles, you should choose a floor with carbon elements. Finishing parts will not be able to damage the thin carbon strips, as the film will be covered.It is possible to install a film underfloor heating under a tile even in rooms with high humidity, but it would still be more correct to use a resistive cable for a tile.
Necessary materials
Before work, you need to prepare the following materials:
- heat-insulating substrate (technical cork, EPPS, isolon, etc.);
- depending on the method of installation - self-leveling bulk composition or moisture resistant GVL / LSU;
- liquid nails or dowels;
- adhesive tape and bitumen tape;
- polyethylene film;
- plastic reinforcing mesh;
- film floor for tiles and accessories for it (clamps, wires, etc.);
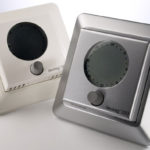
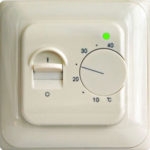
- thermostat;
- tile adhesive and ceramics, depending on the choice of finish;
- multimeter or probe-screwdriver;
- pliers, drill with nozzles, scissors and tape measure.
Installation steps
The calculation of the cost of heating is carried out along with the preparation of an installation plan. Heaters are placed only on a furniture-free area, so it is required to mark its location on the plan, and indent 5-7 cm from free walls. The rest of the space is divided into strips equal to the width of the heaters and the required amount is calculated in meters.
It is necessary to lay infrared warm floors under the tiles in several stages:
- prepare the base for IR heaters;
- install a heating system;
- connect and test it;
- lay the base for the tiles and stick the material.
Training
The base must be cleaned of debris and potholes repaired. The technology of installation of an infrared warm floor provides for laying insulation from heat-saving materials. For this, coatings with low shrinkage and without a foil layer (cork, EPS, etc.) are used.You can attach them to the rough base with liquid nails, and to concrete dowels with self-tapping screws. It is desirable to lay thermal insulation over the entire area of \u200b\u200bthe room. On the floor, make markings according to the plan, indicating the boundaries of the installation of elements and strips of material.
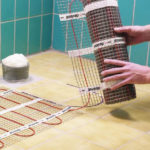
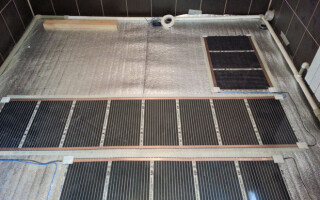
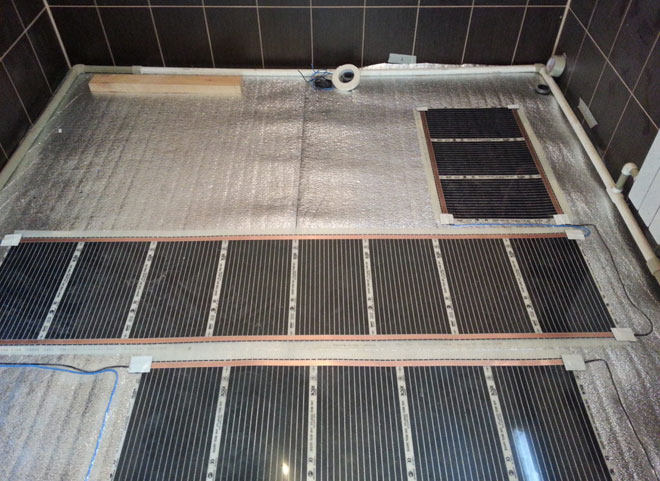
Thermal film installation
Before laying the infrared floor heating film, the rolled material must be cut into strips according to the markings. It is necessary to cut the material only in specially marked places where scissors are shown. Tapes of infrared heaters should not overlap each other, leave a gap of 5-7 mm between the strips of the film floor. You can fix the tape to the floor with liquid nails.
Connection

Assemble the infrared floor heating system in the following sequence:
- Install the terminal clamps at the exit points of the copper busbars, press them down with pliers.
- Determine the location of the thermostat on the wall.
- Cut the installation wires of sufficient length to connect the underfloor heating to the network.
- To connect the wire to the clamps, insert them into the terminals and crimp them with pliers or a special tool. Connect adjacent tapes in parallel.
- Glue the joints and edges along the perimeter with adhesive tape, insulate the terminals and edges of the tires with bitumen tape.
- Lay the temperature sensor under the film. Lead the wires from the film strips to the point of connection to the network and install them. Check the operability of the system with a tester, determining the absence of an open circuit on each tape, and then on the entire system.
Subfloor installation
Depending on the choice of a dry or wet method, prepare materials: mix a self-leveling compound with water or cut GVL.For moisture insulation, cover the installed TP system with polyethylene, leaving allowances of at least 5 cm along the edges. Carefully glue around the perimeter with adhesive tape. Depending on the peculiarities of laying the film floor under the tiles on a concrete base, proceed as follows:
- Dry way. Cover the entire area of \u200b\u200bthe room with cut plates of GVL or LSU. Attach elements to liquid nails or self-tapping screws with dowels. Screw the threaded fasteners carefully into the gaps between the TP tapes or into the places intended for cutting off parts. Do not drive a screw into a tire or carbon strips. If necessary, the rough coating is performed in 2 layers, overlapping the seams of the lower level.
- wet way. Lay out a reinforcing plastic mesh on top of the moisture insulation (do not use a metal mesh). Its edges should go beyond the perimeter of the TP and polyethylene by 20 cm, the mesh is fixed with self-tapping screws. Pour the base and the IR film system with the self-levelling compound. Layer thickness - 8-10 mm. The coating should set within 24 hours.
Laying tiles
Before laying the ceramic coating, the surface of the base must be treated with concrete contact in 2 layers. Install insulation around the perimeter of the wall to create a thermal seam. Prepare tiles. We apply the adhesive with a notched trowel, in separate sections that can be filled with tiles in 30 minutes.
Align the ceramic elements in height by pressing them against the adhesive. Let the glue harden, fill the joints with grout, pressing it into the gaps with a rubber spatula. Remove the remains of the composition from the ceramics with a wet cloth, not allowing them to dry. After laying, care for ceramics should be carried out according to the general rules.
Similar articles: