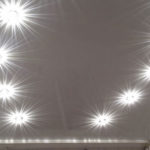
When designing, performing finishing works and arranging modern interiors in the premises of private houses and apartments, it becomes necessary to calculate and select a lighting system and, accordingly, lamps. This issue must be approached responsibly and reasonably, since low and poor-quality lighting significantly affects human health and comfort. An excellent solution for these purposes and all types of ceiling coverings are ceiling spots. This review will help you understand the types of ceiling lights, select, mount and connect these lighting fixtures.
Content
Classification of ceiling spots
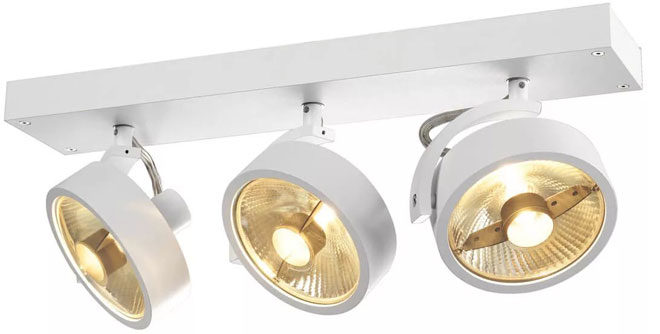
Ceiling lamps are widespread and can have a different configuration. The main distinguishing features of the luminaires in terms of design, in addition to their appearance, are their installation method and the type of lamps used.
According to the method of installation, ceiling lamps are distinguished:
- Embedded: often used in combination with stretch or false ceilings, they look very aesthetically pleasing, compact and are distinguished by a simple installation method.
- Suspended: in a broad sense, they are not spots, but belong to the groups of chandeliers, sconces and others. Often used for decorative lighting or when mounted to standard ceilings and custom chandelier fixtures.
- Overhead: mounted directly to the ceiling with dowels and self-tapping screws.
By type of lamps used:
- Halogen: they are efficient and environmentally friendly lamps with a long service life and high light output, but they have significant drawbacks, such as high electrical energy consumption, heating and high sensitivity to voltage drops in the network.
- LED: safe and energy-efficient lighting devices, have a long service life and a wide range of light temperatures, heat up little and have a high efficiency. The disadvantages of this type are: flickering of lamps when buying cheap Chinese lamps from unknown manufacturers (affects vision and eye fatigue) and a higher price compared to other options.
- Incandescent lamps: are losing their popularity due to the fact that they are uneconomical and short-lived devices, have low efficiency, heat up, but are still used by many consumers due to a very affordable price.
- Fluorescent: as well as LED - very efficient and economical, have a more affordable price. The disadvantage of these lamps is their insecurity in case of damage (contains poisonous vapors of mercury and argon) and environmental friendliness.
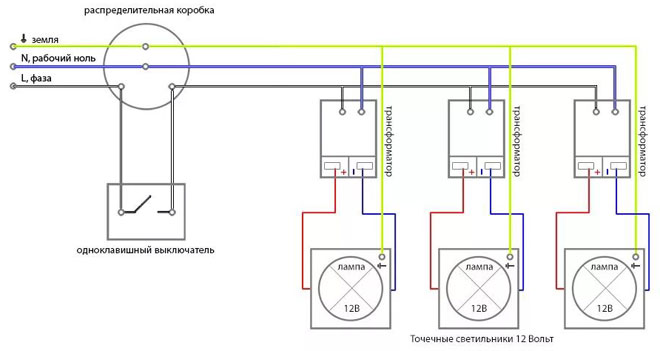
Connection diagrams 220V
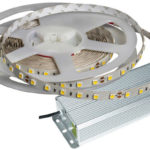
Depending on the voltage design, the lamps are available in 220V and 12V. When installing fixtures on 12V, it is necessary to use a special device - a step-down transformer, which is calculated based on the number and power of connected devices. When installing fixtures for 220V, a transformer is not needed and they are connected directly to the network in series or in parallel.
Serial connection
This connection scheme is not often used, as it has some disadvantages. A series circuit is a simple installation method in which the luminaire is connected one after the other. A phase wire is connected to the first lamp, then the next lamp is connected to the other wire, the next one from it, and so on. A neutral conductor is connected to the free wire of the last spot.
Such a scheme is not particularly effective, because if one lamp fails, the entire circuit will not work and you will have to look for a burned-out device, sorting through and checking all the lamps.

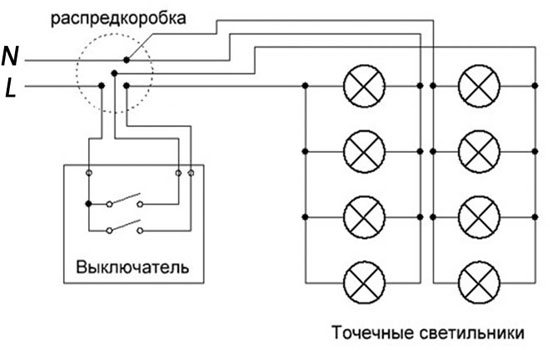
Parallel connection
It is a time-consuming installation method, but it is highly efficient due to the independence of individual lamps from the performance of other lamps. When connected in parallel, the lamps will have the same light output, regardless of the number of connected fixtures.Parallel connection is radial and stub.
With a beam connection, the power cable is connected to the junction box, and from it each ceiling lamp is connected with a separate cable of the required section. There is no difficulty in installation in this way, but it takes more time and is characterized by a high consumption of the electric cable.
Daisy-chaining consists in laying the cable and connecting the first lamp with subsequent connection to its outputs (zero and phase) of the second lamp, a third lamp is connected from both terminals of the second lamp, and so on.
Installation steps
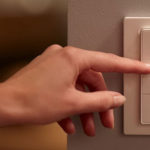
Important! When performing installation work, be sure to comply with all electrical safety requirements, work only with the power turned off! If there is any doubt that you will be able to master this type of work, then it is better to contact a professional electrician - this will save your nerves and time.
Choosing the location of spotlights
The choice of the location of the fixtures depends on the room and interior, the number of ceiling levels and the purpose of lighting. To understand how many fixtures for the main lighting are needed, when drawing up a project or scheme, consider the following rules:
- Place luminaires at least one meter from each other;
- Lamps are usually placed at a distance from the wall. 50-60 centimeters;
- Consider areas where additional lighting will be needed;
- The distance from the ceiling frame and the draft ceiling should be from three centimeters for ease of installation of fixtures.
Material calculation
The calculation of the required amount of materials is made depending on the number of installed fixtures.
Based on the interior design or luminaire layout, the number of lighting points, the distance to them from the junction box and the switch are taken into account. Next, the connection method is selected and, in accordance with it, the length of the required electrical cable and the number of connecting terminals are calculated (for high-quality, accurate and quick installation, it is recommended to use terminals).
As a result, a list of necessary materials is compiled and they are purchased and delivered to the installation site.
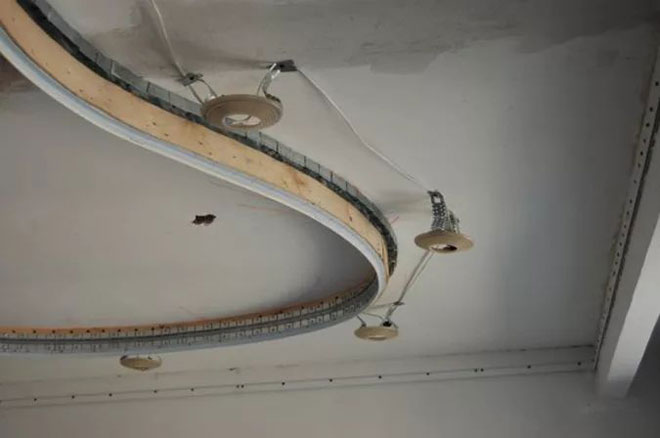
Wire laying
mount wiring to the locations of ceiling lights is most convenient before the installation of stretch or suspended ceiling structures.
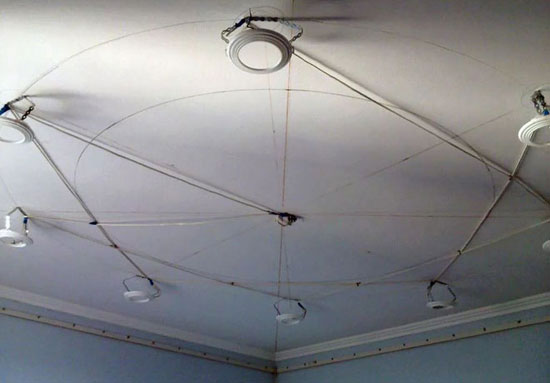
With stretch ceilings, the locations of the lamps are marked, special embedded products are installed, on which spots will subsequently be installed and a cable is pulled to each of them (it can be fixed to the ceiling with special mounting clips).
When installing frame stretch ceilings, the cable is mounted on a metal frame before facing the ceiling with plasterboard sheets or plastic panels. The wire is bred to each installation site of the lamp and is fixed to the frame with plastic clamps.
To the lighting fixtures, depending on whether they are grounded or not, a two- or three-core electrical cable is pulled. The type and cross-section of the cable depends on the power of the fixtures. Often, SHVVP 2x1 is used for low-power lamps, but other types of cable can also be used.
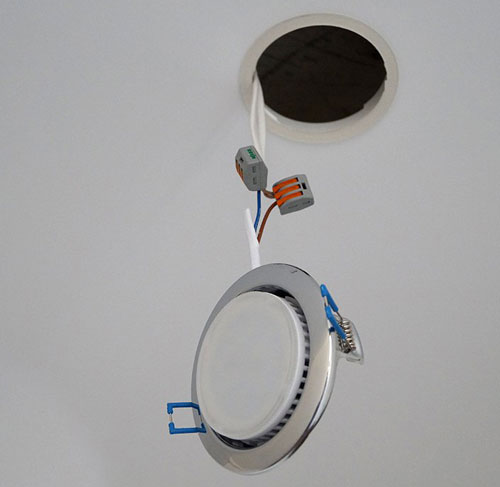
Hole preparation
Hole preparation also depends on the type of ceiling.With a stretch ceiling, a special ring is glued strictly in accordance with the hole of the embedded part, along the inner contour of which a hole is cut out for the lamp. With a suspended ceiling, made of plasterboard or plastic panels, the center of the holes on the structure itself is marked, the required diameter of the crown is selected and the holes themselves are drilled with a screwdriver or drill.
Connecting spotlights
Having completed the wiring of the electrical cable, it is necessary to connect the devices. If the mounted fixtures are designed for a constant voltage of 12 V and the cable was led from a transformer, then it is important not to confuse the "plus" and "minus", otherwise the lighting will not work. With AC lamps with a voltage of 220V, there is no difference to which output of the device to mount "zero", and to which "phase".
Fixing fixtures
Ceiling fixtures are fixed depending on the design. Recessed fixtures are fixed with the help of special brackets located on them. Overhead are fastened with self-tapping screws, and suspended with hooks.
When fastening, make sure that the fastening or self-tapping screws will not touch the electrical cable.
At the end of all work, it remains only to turn on the lighting, make sure everything works correctly and enjoy the light.
Similar articles: