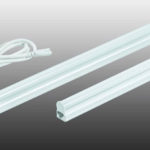
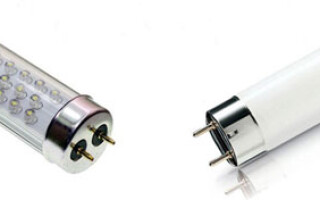
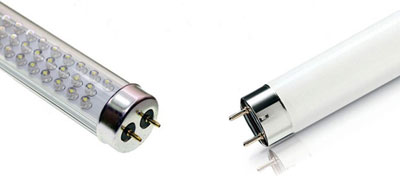
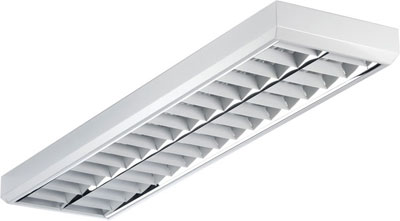
LED lamps in many respects correspond to fluorescent lamps: dimensions and appearance, brightness of the glow, the same base. LEDs differ from fluorescent lamps in their long service life, light source and no need for special disposal.
Thanks to this similarity, it became possible to save money - to replace only the light source in failed or obsolete lamps, leaving the old frame.
Replacing fluorescent lamps with LED ones does not require special skills - if there is an algorithm of actions, the home master can handle the alteration on his own.
Content
Rework Benefits
The minimum value of the duration of the LED lamp, declared by the manufacturers, is 30,000 hours. Much depends on light elements and electronic ballast. But the benefit of redesigning a fluorescent lighting fixture is obvious for a number of reasons.
Consider which is better - LED lamps or fluorescent lamps:
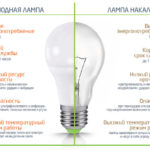
- The main difference between fluorescent lamps and LED lamps is energy consumption. Fluorescent fixtures use 60% more electricity.
- LED lighting fixtures are more durable in operation. The average value of the service life is 40-45 thousand hours.
- LEDs do not need maintenance and revision, it is enough to remove dust and sometimes change tubes.
- LED tubes do not blink, it is advisable to install them in children's institutions.
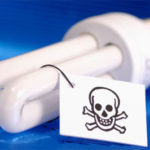
- The tubes do not contain toxic substances, do not require disposal after the end of their service life.
- LED analogues of fluorescent lamps also work with voltage drops in the network.
- The next advantage of LEDs is the availability of models designed to operate on supply voltages from 85 V to 265 V. A fluorescent lamp requires uninterrupted power supply of 220 V or close to it.
- LED analogues have practically no drawbacks, the exception is the high cost of premium models.
Luminaires with electromagnetic control gear
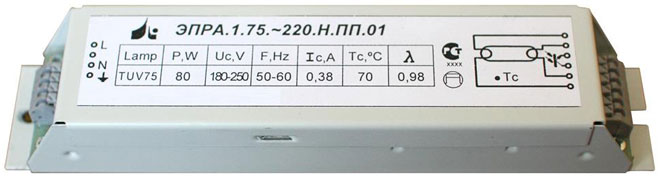
When converting a fluorescent device into an LED one, pay attention to its design. If you are remodeling an old lamp from the times of the Soviet Union with a starter and an electromagnetic ballast (ballast), there is practically no need for modernization.
The first step is to pull out the starter, pick up the LED of the required size and insert it into the housing. Enjoy bright and economical lighting.
If the starter is not dismantled, replacing fluorescent lamps with LED ones may cause a short circuit. Throttle does not need to be removed.LED current consumption - an average of 0.15 A; the part will serve as a jumper.
After replacing the lamps, the luminaire will remain the same, there is no need to change the ceiling mount. The handsets are equipped with built-in drivers and power supplies.
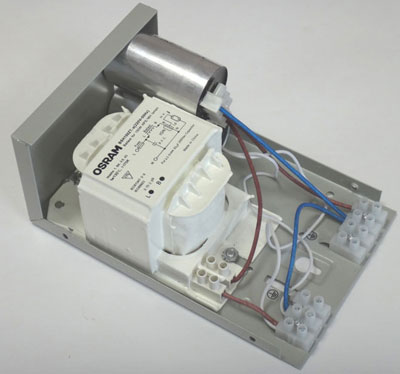
Alteration of the lamp with electronic control gear
If the illuminator model is more modern - an electronic ballast throttle and there is no starter - you will have to make an effort and change the connection diagram of the LED tubes.
Components of the lamp before replacement:
- throttle;
- wires;
- pads-cartridges located on both sides of the body.
We get rid of the throttle first of all, because. without this element, the design will become easier. Unscrew the mount and disconnect the power wires. Use a screwdriver with a narrow tip or pliers for this.
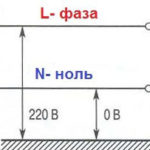
The main thing is to connect 220 V to the ends of the tube: apply the phase to one end, and zero to the other.
LEDs have a feature - 2 contacts on the base in the form of pins are rigidly interconnected. And in fluorescent tubes, the contacts are connected by a filament, which, when heated, ignites mercury vapor.
In lighting devices with electronic gear, no filament is used, and a voltage pulse breaks through between the contacts.
It is not so easy to apply 220 V between contacts with a hard connection.
Use a multimeter to verify that the voltage is being applied correctly. Set the device to the resistance measurement mode, touch the measuring probes to two contacts and take measurements. The multimeter display should show a zero value or close to it.
In LED lamps, between the output contacts there is a filament, which has its own resistance.After applying voltage through it, the filament heats up and sets the lamp to work.
Further connection of the LED lamp is recommended to be done by 2 methods:
- without dismantling cartridges;
- with dismantling and installation of jumpers between contacts.
without dismantling
Refusing to dismantle the cartridge is an easier way: there is no need to understand the circuit, make jumpers, climb into the middle of the cartridge and mess with the contacts. Before dismantling, you need to buy a few Wago clamps. Remove the wires leading to the cartridge at a distance of 1-2 cm. Insert them into the Wago clamp.
Do the same on the other side of the light fixture. It remains to apply a phase to the terminal block on one side, and zero on the other. If it was not possible to purchase clamps, twist the wires under the PPE cap.
With the dismantling of cartridges and the installation of jumpers
This method is more meticulous, but does not require the purchase of additional parts.
Action algorithm:
- Carefully remove the covers from the sides of the lamp.
- Dismountable cartridges with insulated contacts located inside. There are also springs inside the cartridge, which are necessary for better fastening of the lamp.
- 2 power wires lead to the cartridge, which are fastened in special contacts without screws by snapping. Scroll them clockwise and counterclockwise. After that, by force we get one of the wires.
- Because the contacts are isolated, when dismantling one of the wires, the current will pass through only one socket. This will not affect the performance of the lamp, but it is better to put a jumper and thereby improve the device.
- Thanks to the jumper, you do not need to try to catch the contact by turning the LED tube to the sides.
- It is recommended to make a fixture from the extra supply wires of the main lighting fixture, which will remain after the work of replacing the lamps.
- The next step is to check for continuity between the isolated connectors after the jumper is installed. We perform similar actions on the other side of the lamp.
- Follow the rest of the power wire. It should be zero, not phase. Remove the rest with pliers.
Fluorescent lamps for two, four or more lamps
If you are converting the lamp to 2 or more lamps, it is recommended to apply voltage to each of the connectors with different conductors. The design has a drawback when installing a jumper between several cartridges. If the first tube is installed in the wrong place, the second one will not light up. You take out the first tube - the second goes out.
On the terminal block, to which the phase, zero, ground are connected in turn, bring the conductors that supply voltage.
Before attaching the luminaire to the ceiling, check the operation of the lamps. Apply voltage; adjust outgoing contacts if necessary.
LED lamps give out a directional beam of light, unlike daylight devices, in which illumination occurs 360 °. But the function of turning 35 ° in the base and the rotation of the base itself will help to adjust and direct the flow of light in the right direction.
Not every base in the lamp is equipped with this function. In this case, move the chuck holder 90°. After checking, fix the device in the right place.
The benefits of replacing lamps are clear:
- rework methods do not require special skills and knowledge, in addition, they are cheap;
- more economical energy consumption;
- the illumination is higher than that of fluorescent devices.
Extend the life of outdated fixtures and enjoy and benefit from bright, affordable lighting.
Similar articles: