When installing decorative lighting or main lighting from LED strips, a task inevitably arises, which can be quite difficult for an ordinary person to solve without electrical skills - how to properly connect LED strips to each other and to electrical power. We will try to answer this question in this article.
Content
Ways to connect an LED strip to a 220 V network
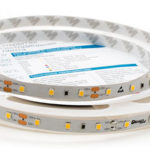
The most common types of led strips, which are mass-produced for the market of Russia and other countries, are designed to be connected to direct current with a voltage of 12 volts.
Is it possible to connect an LED strip to 220 without a power supply
There are connection methods that allow you to connect such tapes to a 220 V network directly: a diode bridge, capacitors and serial connection of tape segments to each other are used. But this method is inconvenient, difficult to install and impractical from the point of view of practical application. The cost of components for such a connection is comparable to the cost of buying a power supply, so the connection method using special step-down transformers from 220V AC to 12 or 24V DC.
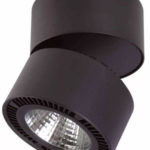
Wiring diagram for a 12 volt power supply
For ease and convenience of connection, as well as stable and clean lighting, 12-24 volt power supplies are used. Such devices are impulsive and can lower the voltage to the required one and rectify the current by generating high frequency pulses (10 kHz).
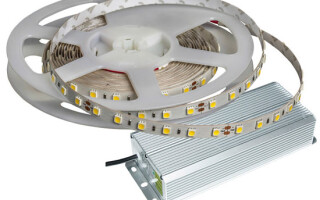
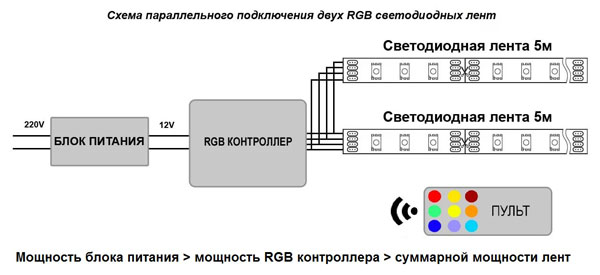
The power supply is selected based on the power of the LED strip (which is determined depending on the type of LEDs, the density and length of the tape), always leaving a margin of power for safe and reliable operation.
Recommendation! Choose a power supply with a power reserve of 20-30% more than the total power of the tapes that it will power.
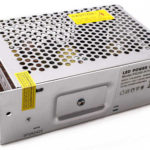
The power supply for LED lighting has input terminals for connecting to a 220 V network and output terminals for supplying power to the lighting device. The connection of the LED strip to the transformer is carried out using wires of a certain section to the plus and minus terminals. It is important to understand that polarity is important, so the poles of the tape and the poles of the power supply must match when connected (plus to plus, minus to minus) otherwise the system will not work.In the generally accepted color coding, the red conductor means "plus" and the black one "minus".
When installing lighting using LED strip, the simplest is to connect a single-color strip. Such a device is connected directly to the "plus" and "minus" of the power supply, and the power supply is connected to the network (if necessary, switches or control devices are introduced into the circuit). The only difficulty that may arise during this installation is soldering the wires to the contacts of the LED strip.
Symbols on the power supply
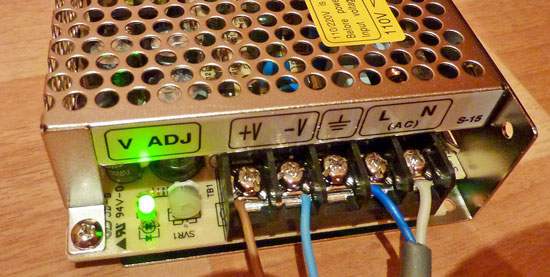
Standard power supplies for LED strips have a special marking on their body, which indicates the voltage and power of the device. This information is necessary for selection of the necessary power supply to the parameters of the LED strip. To connect lighting, you only need to know the designations of the contacts to which the conductors will be connected. In the general case, the power supply will have L on one side (contact for connecting a phase conductor) and N (neutral wire), and on the other there will be signs “+V” and “-V” (+12V and -12V DC).
Some power supplies already have an attached cable with an electrical plug and do not require a separate wire to supply power to the terminals L and N, but simply plug into the outlet.
Connecting a color RGB tape
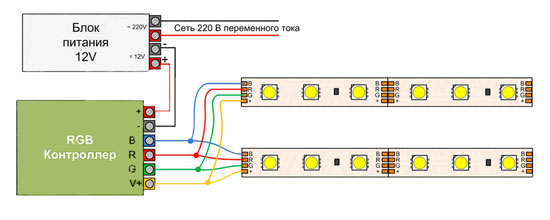
The connecting link between the step-down transformer and the RGB LED strip is a special controller with which you can connect such a device and control lighting shades or set operating modes. Without it, such a tape will be impossible to connect and use all its functions.
Connecting an RGB strip in the general case is as follows: the corresponding contacts of the LED strip are connected to the controller contacts with the designations R, G, B and V +. Next, conductors are connected to the plus and minus terminals of the controller, which are connected to the plus and minus of the transformer, and then the transformer is plugged into a socket or connected to the network in the standard way.
Note! In this scheme, there is no need to add a switch or additional control device to the circuit, as standard controllers include this function.
Each controller has a limit on the power that can be connected to it. Therefore, when several tapes are connected in parallel, a special amplifier can be used. In general, with this connection, the circuit does not become much more complicated, since amplifiers are connected to additional tapes, which are powered by a common powerful adapter or an additional power supply.
Power tape connection diagram
LED strips, like any lighting devices, have different emissivity, which directly affects the power of the strip. For powerful devices, there are no differences with conventional ones when connected, with the exception of more powerful power supplies and controllers (in case of RGB variant).
When connecting high-power LED devices, it is important to take into account their heating. Such tapes must be mounted on special aluminum profiles for fast and reliable heat dissipation. This will protect the tape from overheating and significantly increase the durability of such lighting.
Ways to connect multiple LED strips
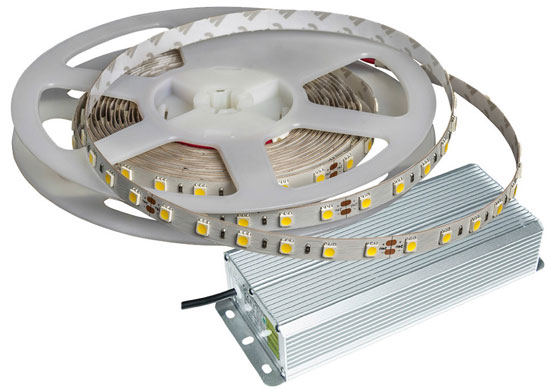
Typically, manufacturers produce LED strips in coils 5 meters long. This is a standard unified length, which is convenient for most manufacturers. For various tasks, it becomes necessary to connect several LED strips for their simultaneous operation in different parts of the premises or with a large length of the illuminated area. With such a connection, there are certain nuances and difficulties.
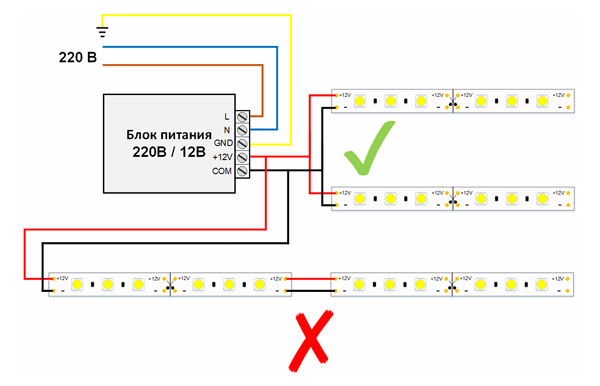
Parallel connection scheme
As with most lighting fixtures, the most common and convenient option is parallel connection LED strips. This method is suitable when simultaneous operation of tapes is required without reducing their light output.
The connection looks like this:
- Solder to the contacts of the tapes (or connect) conductors;
- Further, the “pluses” of all tapes are interconnected;
- Connect the "minuses" of all tapes;
- The common plus and common minus are connected to the corresponding poles of the transformer with the calculated power.
Methods for connecting two tapes to each other
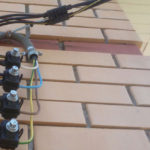
If it is necessary to mount the tapes on the same plane one after the other, then they are also connected in parallel. But to simplify the circuit and save wires, such a connection can be made using connectors or short conductors.
Connecting the LED strip with plastic connectors
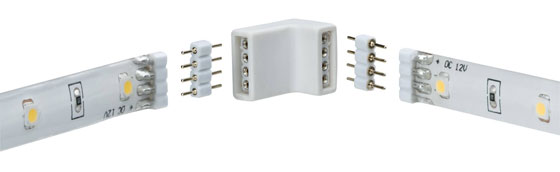
To simplify the connection and in the absence of soldering skills (or soldering iron) to connect several single-color or multi-color strips to each other, you can use special plastic connectors for LED strips. They are available at most electrical or lighting supply stores.The principle of connection using such components is simple: the contacts of the LED strips are connected to the contacts of the connector and fixed.
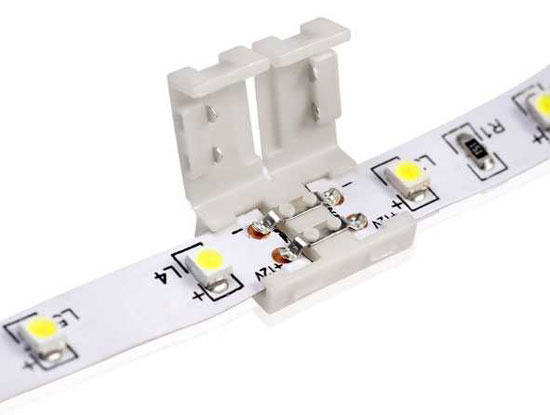
Connectors are both straight and designed for corners and various bending options.
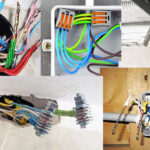
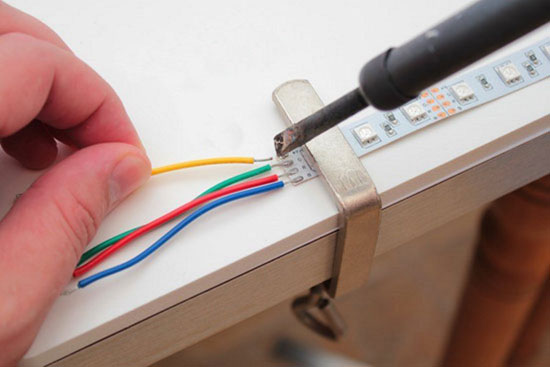
Solder connection
The most reliable option for connecting LED strips to each other is soldering. At the same time, this method is the most time-consuming and requires certain skills and tools.
This connection can be made in two ways:
- Connect the tapes by soldering directly.
This method involves soldering two pieces of tape without the use of conductors. The tapes are overlapped and soldered at the contact point. This option is used when mounting the tape in a conspicuous place so that it is not visible wires and tape junctions.
- Connect with wires
This method is the most preferred, as it is reliable. Conductors are soldered to the contacts of one segment, which, in accordance with the polarity, are soldered to another tape. Moreover, the conductors can be of any length if necessary.
Pros and cons of different compounds
- Solder connection
| Advantages | Flaws |
|---|---|
|
|
- Connecting with connectors
| Advantages | Flaws |
|---|---|
|
|
Errors when connecting LED strip
No one is immune from mistakes, therefore, when connecting LED strips, they are allowed by both home craftsmen and professionals. The most common mistakes when connecting LED strips are:
- Overlapping contacts when soldering;
- Overheating of the contacts with a soldering iron, due to which the integrity of the tape and contacts at the soldering point is violated;
- Incorrect calculation of the power of the power supply, connection of several tapes in power exceeding the parameters of the transformer;
- Installation of powerful tapes without a heat sink;
- Incorrect tape selection (for example, the use of outdoor tapes or transformers that are not protected from moisture);
- Connecting multiple RGB strips to one controller without amplifiers;