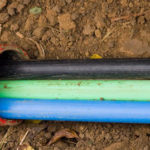
Pipes laid underground are constantly exposed to low temperatures. So that during the winter frosts the water supply does not fail, a heating system is laid along the communications. Do-it-yourself installation of a heating cable for plumbing is easy if you follow all the instructions.
Content
Why you need a heating cable
Some people believe that if the pipes are laid to a sufficient depth, then the cable can not be used. The soil temperature at a depth of 1.5-1.7 m is + 2 ... -4 ° C, and if the water supply or sewer system is insulated, they will not freeze.At the same time, the functional properties of the pipes will be violated if the site is swampy or located near a reservoir, since during the melting snow they will be constantly flooded with water. With a heating system and proper thermal insulation, pipe laying can be done at a depth of 0.5 m.
Design and methods of application
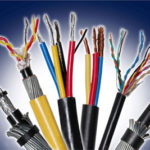
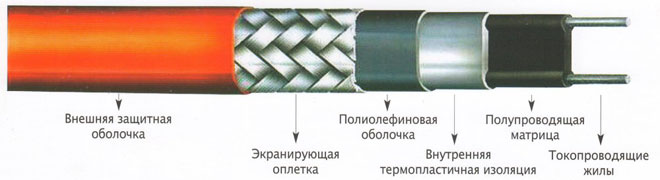
The principle of operation of the cable is to reproduce heat by converting it from electricity. The cable receives electricity and transmits it to the pipe, thus preventing the liquid inside from freezing. Anti-freeze protection of pipes is divided into several types, which are designed to heat not only water and sewer pipes, but also for drains and tanks. They have different specifications and are used outside pipes and underground. Design features of the cable:
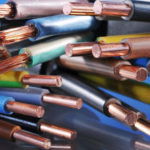
- The cable consists of one or more cores that are inside it. They are made from alloys with high resistance to electric current. The volume of specific heat release depends on this indicator. The higher the resistance, the greater it is.
- The inner core is protected by a polymer sheath and an aluminum screen. Sometimes it is braided with copper wire.
- All internal parts are covered with an outer shell. It is made of durable PVC material, which is waterproof and UV resistant.
Depending on the manufacturer, the composition of the cable may vary.
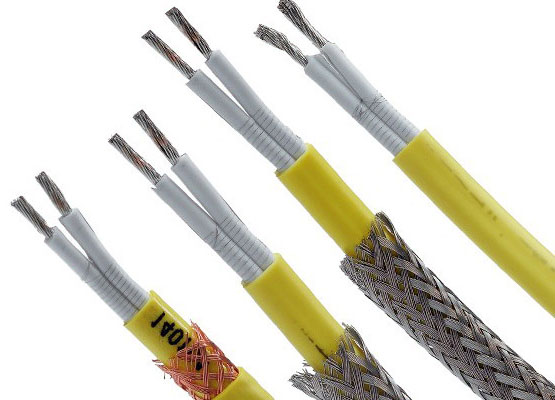
Types of heating cable for plumbing
The heating cable is divided into 2 types, each of which is used in different areas. It can be self-regulating or resistive. The self-regulating model is used on long water pipes.Short pipes with a cross section of not more than 40 mm in diameter are heated with resistive models.
resistive
The cable works according to the following connection scheme: the current passes through the inner cores of the wire and heats it, releasing a large amount of heat. A high heat dissipation rate is obtained due to the high resistance and maximum current strength. You can purchase a wire that generates heat along its entire length in the same proportions. These models have constant resistance. What you need to know when connecting the wire:
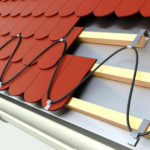
- Single core. To heat a roof drain or equip a warm floor, a heating circuit of the “closed” type is used. For this, wires with one core are used. Connecting a solid wire is like a loop. The wire is wrapped around the pipe, and its ends are connected to electricity. To insulate the water supply, an external type of connection is used and the wire is laid on both sides of it.
- Two-wire. If it is necessary to make internal laying, then use a two-wire wire. It consists of two cores: heating and supplying energy. The wire is laid along the water supply, connecting one end to electricity. With the help of tees and seals, two-core wires can be laid inside the pipe.
This is an inexpensive, reliable wire that has a long service life (15 years). Its disadvantages: standard length, power is always the same and cannot be adjusted. Because of one burnt section, you will have to change the entire cable. If 2 cables are close to each other or intersect, they will burn out. By installing a thermostat with sensors, the system will turn itself off and on.The energy will turn off if the temperature reaches +7°C. If it drops to +2°C, the heating will automatically turn on.
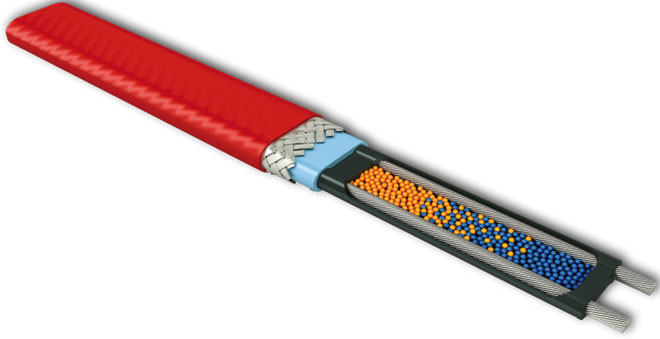
Self-regulating
Multifunctional self-regulating cable is used for sewer lines, plumbing systems and heating of roof structures. Its functionality - the amount of heat supplied and the power level are regulated independently. The heating of the wire occurs on its own after the temperature reaches the set point. If we compare it with a resistive analog, the insulating layers of the wires are the same, but the heating matrices are different. Principle of operation:
- Depending on the resistance of the self-regulating cable, the conductor is able to change the current strength up or down.
- As the resistance increases, the current begins to decrease, thereby minimizing the power.
- As the wire cools, the resistance decreases. The current strength increases, starting the heating process.
If you automate the system with a thermostat, then, depending on the temperature conditions on the street, it will independently control the process of switching on and off.
Main technical characteristics when choosing
The choice of the maximum length of the self-regulating cable depends on the size of the area to be heated and the diameter of the pipes. Also take into account to what maximum temperature the soil freezes through. How much electricity a heating cable consumes depends on its power and to what temperature it heats up. The power of the heating cable is selected depending on the diameter of the pipe. Products with a power of 10 W / m are used for pipes up to 2.5 cm in diameter.Pipes with a diameter of 2.5-4 cm are heated by models of 16 W / m. Models with 24 W / m are designed for pipes with a diameter of 4-6 cm. When buying a cable, consider:
- product power;
- temperature class;
- type of external insulation;
- equipment with a protective braid;
- manufacturer.
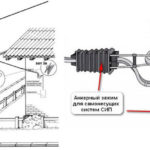
The products of foreign companies Devi, Nelson, Raychem and Ensto are very popular. Also, the products of the Russian company CST (Teplolux) have proven themselves.
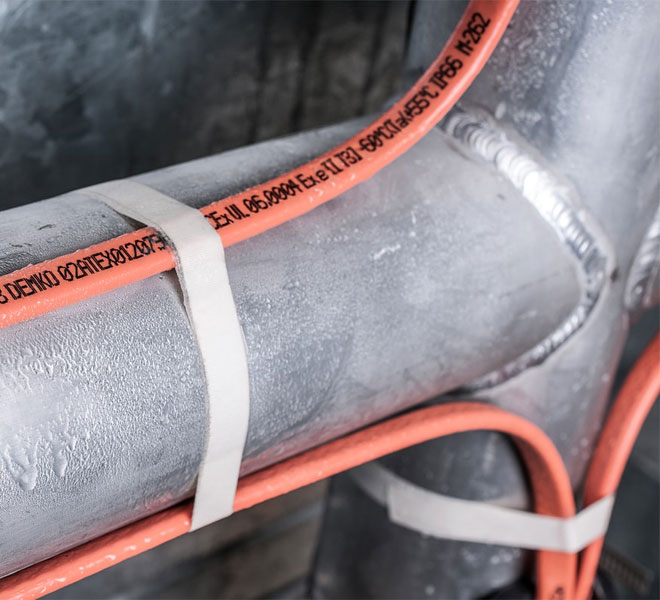
Laying methods
The laying of the heating cable is done in two ways. The external method is winding it on a pipe or laying along it. Internal - lead the wire inside the pipe to prevent freezing of the water supply. The connection of the heating cable is made according to the connection diagram.
Line Editing
When installing the heating cable in a linear way, fixation is done using plastic or fiberglass holders. They are installed at intervals of 0.3 m from each other. Metal fasteners are not used. If the pipes are in the ground, then the location of the wire is done with a slight offset. You can not lay it exactly at the bottom or at the top.
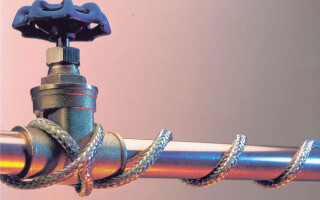
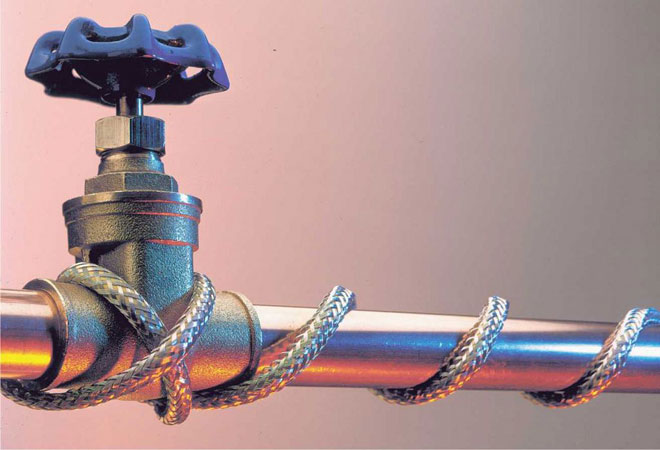
Spiral mounting
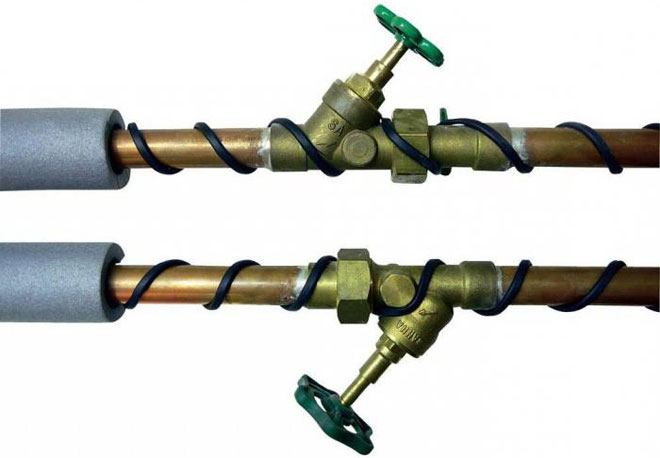
For pipes of medium and large diameter, spiral installation is used. The wire is wound onto the pipe in turns with a uniform interval. The interval of turns is reduced if one of the sections of the pipe freezes heavily. Although such installation requires a large consumption of material, it provides maximum contact between the pipe and the wire.
Internal installation
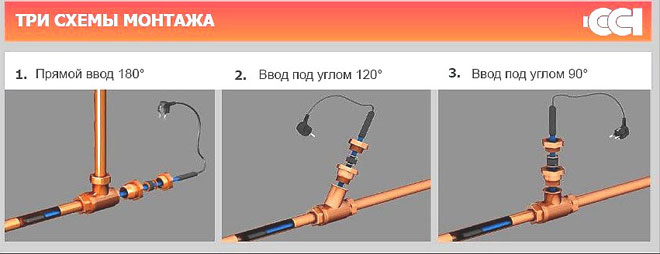
Installing a heating cable for plumbing in an internal way is only suitable for short pipes with a diameter above 0.4 cm. The wire will prevent the passage of water if it is installed in a pipe of a smaller diameter. It will also be difficult to make installation in a long length of water pipe.In pipes with a vertical arrangement, the wire is pulled using a tee and a sealing sleeve.
How to connect to the network and perform verification
The heating cable is connected to a network with a voltage of 220 volts. This is done using a cold cable. It consists of 3 stranded wires and a plug. Before connecting a self-regulating heating cable, it must be laid and carefully fixed. Connection process:
- To expose the braid, 70 mm of outer insulation is removed from the tip of the wire.
- The braid is unwound and twisted with a bundle, then bent to the side.
- To expose the wires, 30 mm of internal insulation is removed.
- To find the cores, the heating semiconductor matrix is cut a little, heated and removed. You can use a hair dryer for heating.
- Sleeves are fixed at the end of the heating wire and the bundle. They are squeezed. Each wire is insulated and fixed with heat.
- To close the tip of the internal insulation, heat shrink is put on. It is clamped with pliers after it heats up and shrinks. To separate the wires, it is pressed in the middle.
- A large heat shrink is put on the power cord. A small heat shrink is pulled onto each wire individually.
- The ends of the wires of the supply cable are inserted into the crimp sleeves and crimped. A heat shrink is put on a bare wire with a sleeve and heated.
- Grounding is done according to the same principle and connected to the braid.
- A large heat shrink sleeve previously put on the wire is advanced to the connecting section and fixed.
By measuring the ohmic resistance, the resistive cable is checked for operability.The final measurement must match the passport data. A small error is allowed. The connection of the self-regulating heating cable is checked by connecting it to the network. If the connection was made correctly, then it will start to heat up. Another way to check is by measuring the current. Its indicators must correspond to the technical characteristics of this model.
Similar articles: