The interior, which was in the homes of our grandparents, remains popular, especially in cottages and wooden baths. Due to the fact that buildings made of this building material can flare up with just one spark, according to the rules for electrical installations (PUE), it is allowed to make open wiring.
But there is one problem with it - a modern appearance that will break the cozy atmosphere of antiquity. The way out is retro-wiring.
Content
Why do people choose not internal, but antique external wiring?
There are several reasons why people choose not internal, but antique external wiring:
- For reasons of aesthetics.
- For security reasons.According to the electrical installation rules (PUE), hidden wiring in wooden walls is allowed, but only if it is in a metal pipe or covered with non-flammable plaster with a layer of 1 cm.
The problem also lies in the fact that there is a shrinkage of a wooden house of a seasonal nature, when during the rains and even just with moist air it becomes a little higher, and when it is dry, on the contrary, lower. Changes can be up to 5 per floor, which is very serious. It is better to make an open retro wiring. It is simpler, more practical, and more beautiful.
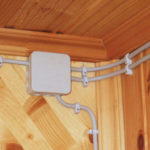
Such retro wiring in a wooden house is relatively safe. But only if it is located at a distance of at least 1.2 cm from walls susceptible to fire and supported by insulators made of metal, ceramic, porcelain or any other non-combustible materials.
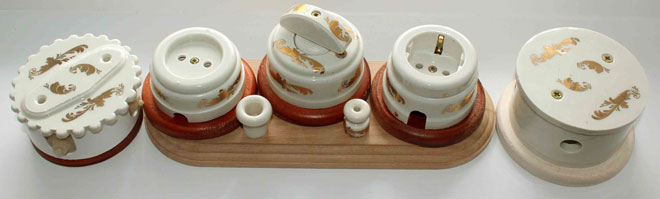
As for sockets / switches, junction boxes for outdoor retro wiring, you should buy metal, ceramic or porcelain. They will look the best. But you can also buy regular plastic ones.
What is needed for retro-style external wiring?
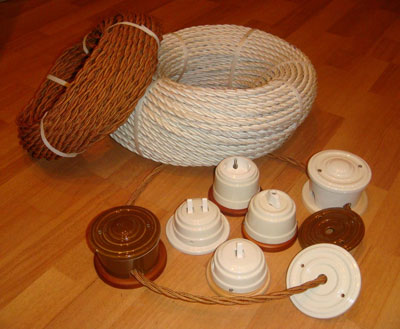
List of what is required for retro-style external wiring:
- Twisted cable that matches retro style.
- Insulators.
- Sockets/switches, junction boxes. They can be made from any material, but the back is non-combustible.
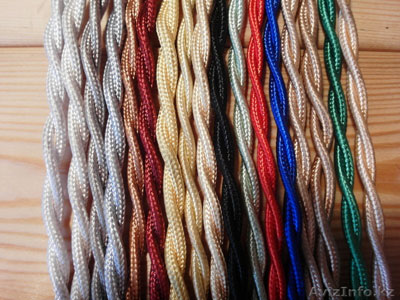
Twisted cable
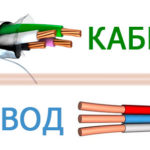
A twisted cable is a conductor that is surrounded by polyvinyl chloride (PVC) insulation, as well as a single layer of textile - as a rule, it is technical silk. It differs from the usual one in that it is impregnated with a flame retardant, a substance that reduces flammability.
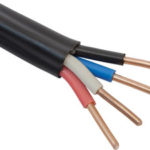
Types of twisted cable:
- consisting of 2 conductors;
- consisting of 3 conductors;
- consisting of 4 conductors.
For a retro wire, a twisted cable consisting of 3 conductors is suitable: the first will be the phase, the second will be the neutral, i.e. zero, the third - protection.
This cable can be divided into groups not only by the number of conductors, but also in accordance with the cross section:
- 1.5 k;
- 2.5 sq. mm.
For sockets, a twisted cable with a cross section of 2.5 square meters is required. mm. One line can process from 2 to 4 devices, if their total power does not exceed 3 kW, and the total current strength is 16A. And for lighting - a cross section of 1.5 square meters. mm. Maximum load: power of 2 kW, current of 10A. This is enough for twenty light bulbs (100 W). And if you plan to screw in economical or LED, then even more.
The most popular twisted cable manufacturers
The most popular twisted cable manufacturers are:
- Italian companies: Gambarelli, Gordon Dor, Fontiny Garby. The first of these has the best twisted cable, it is rigid and easily put on insulators. They are very expensive, from 3 to 5 $ per meter.
- German company Replicata. Pretty much the same quality.
- Russian companies: Gusev, Gemini, Electro. The price is much lower, no more than $2 per meter.
European products are of higher quality than domestic ones.

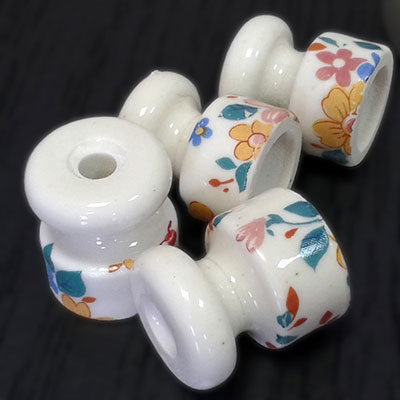
insulators
Insulators are rollers made of ceramic. Their size: diameter - from 18 to 22 mm, height - from 18 to 24 mm. The top is narrow and wide. The first is more convenient for a twisted cable consisting of 2 conductors, the second - for a twisted cable of 3 conductors.
For the installation of insulators, fasteners - self-tapping screws are required.Their length should be such that they sink into the wooden wall by two-thirds. There are insulators to which fasteners are already attached. This is very convenient, since you do not need to waste time searching.
Sockets/switches and junction boxes
As noted above, give preference to sockets / switches and junction boxes made of metal, ceramics and porcelain. Devices made of plastic will look a little silly against the background of wood and antiquity.
Assembly of external wiring in retro style
When assembling retro-style external wiring, not only remember, but also follow the general rules:
- Any branch, whatever it may be, is done in a junction box.
- From the junction box, the wire goes down.
- The interval between the socket/switch and the door/window jamb must not be less than 10 cm.
- The interval between the socket / switch and the heating system, water supply, gas pipeline should not be less than half a meter.
The assembly of external wiring itself begins with the fixing of the insulators. The distance between them is from 30 to 80 cm. In the case of a log house, insulators should be installed through one.
Sockets / switches are placed at a distance of half a meter from the last insulator. Maybe a little less, but don't overdo it. A twisted cable can sag and you have to do double work - shorten it and connect it again.
Now you know how to mount electrical wiring in retro style. Look at the pictures on the Internet before doing the work. That way you'll know what looks best.
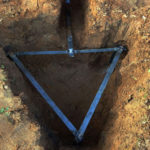
This image shows how much distance should be between the insulators when cornering. Even though this picture is taken from an old book, the information is still valid today.
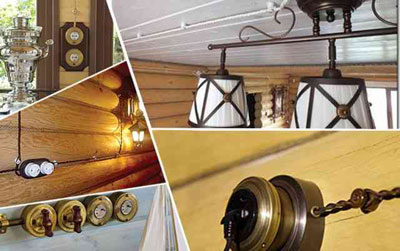
How to use retro wiring in a wooden house to create a true antique interior?
In order to properly use retro wiring in a wooden house to create a true antique interior, you will need to work hard. The fact is that such wiring will be in everyone's mind and any, even the slightest, mistake will be noticeable.
Since you will be doing retro-style wiring not in an apartment, but in a wooden house, be prepared for the fact that after removing incorrectly installed fasteners, dents will appear on the wall. It's not easy to hide them.
Therefore, before starting work, take a piece of paper and a pencil and at least sketch out what you want to do. Transfer the drawing to the wall, you can use the same pencil, but be careful not to damage the surface.
If you doubt that sockets/switches and junction boxes are in the right place, then check. Take a regular, or better masking tape and attach a wire to the ceiling. So you can understand what will happen in the end and, if necessary, make changes.
Separately, we should dwell on the following. If the wooden house has not yet completely settled, then the twisted cable must be pulled. If it survived or was built from glued beams, then the wire, on the contrary, does not need to be pulled. It is very important to find that golden mean when the cable is not tightly and not loosely wound on insulators.
Similar articles: