If your goal is to make spectacular lighting in the apartment, move away from the usual stereotypes and look at the equipment of the apartment from a different angle, then you will be interested to learn more about such an invention in the world of electronics as a touch switch. A modern device will help equip your home according to the "Smart Home" system.
Content
Touch switch - what is it and where is it used
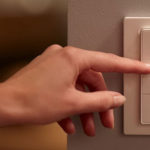
Sensor switch is an electronic device that enables or disables the device using a sensor signal - light touch, sound, movement, signal from the remote control - in the sensor's sensitivity zone. Mechanical pressing of the key, as on a conventional switch, is not required. This is the main difference between a touch switch and a conventional keyboard switch.
Such switches are used in an apartment or house, most often for the lighting system, as well as for raising blinds, curtains, opening garage doors, turning on or off household appliances, and adjusting heating systems.
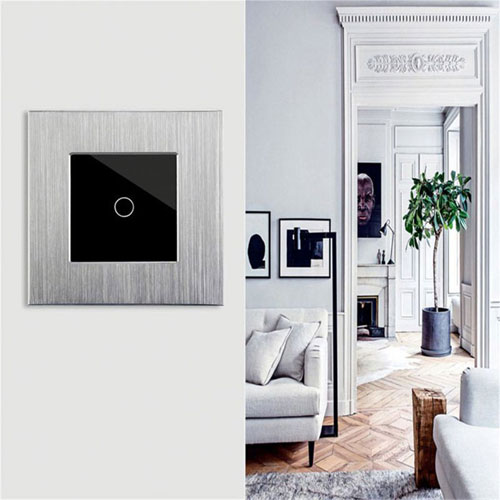
Stylish appearance will decorate the interior, and ease of use will give additional comfort. Such a switch is built into the surface of an electrical appliance, for example, in a table lamp. To turn on the device, just touch it. Also, the switch sensor can be controlled by remote control, voice, react to movement, be equipped with a timer, dimmer. The timer will help save on electricity, and the dimmer will create the intensity of lighting that you need. For example, create a cozy subdued light for a romantic dinner or a relaxing evening.
The touch switch is used to save energy in places with high traffic of people. For example, in the entrance. The sensor reacts to movement when the tenant enters the entrance and turns off after a certain time.
Such a switch can be placed in the yard of a private house to illuminate the yard if necessary. This will reduce electricity consumption.
It is possible to equip the office with touch switches, for the convenience of switching off and on the lighting, closing and raising the blinds.
Thus, the touch switch is suitable for:
- apartments;
- private house;
- office
- public places;
- house territories.
Device and principle of operation
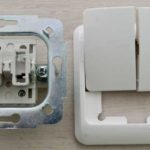
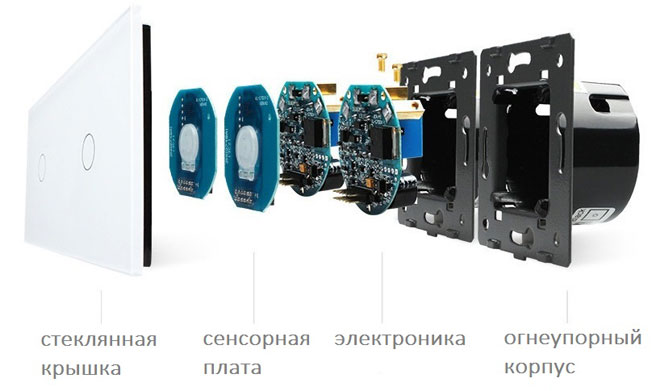
The touch switch consists of four main elements:
- frame;
- electronic board (switch);
- protective panel;
- touch sensor.
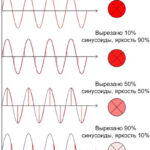
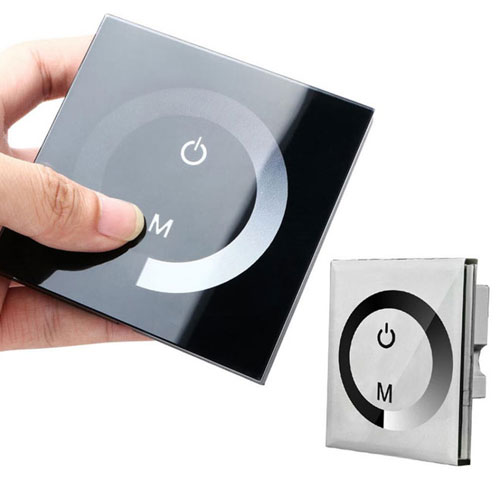
The touch sensor transmits a signal (touch, sound, movement, signal from the control panel) to the electronic board. In the switch, the oscillations are amplified and converted into an electrical impulse, which is enough to close / open the circuit - turn the device on and off. It is possible to smoothly apply the load, which regulates the brightness of the lighting. This is due to the duration of the touch. Such switches are equipped with a dimmer.
Important! Energy-saving and fluorescent lamps are not suitable for a dimmer design. Use halogen or conventional.
Savings on electricity will occur by dimming the lighting power.
Types of touch switches
Touch switches are of several types:
- capacitive;
- optical-acoustic;
- with control panel;
- with a timer.
To make the right choice for your needs, consider each type in more detail.
capacitive
Popular type of switch. The touch sensor is very sensitive, it is triggered when people approach, when the hand is brought to the touch surface or held next to it. Such a switch will be relevant in the kitchen, because you do not need to touch it for it to work.
These switches are stylish and easy to use. They are easier to care for than conventional pushbutton switches.
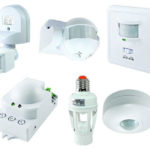
Opto-acoustic switches
These switches respond to sound or movement within the sensor's range. When no one is in the room, the light turns off. They allow you to save energy. In apartments, such switches are rarely used. They are more often placed in common areas to illuminate rooms or open doors that "feel" the visitor's approach.
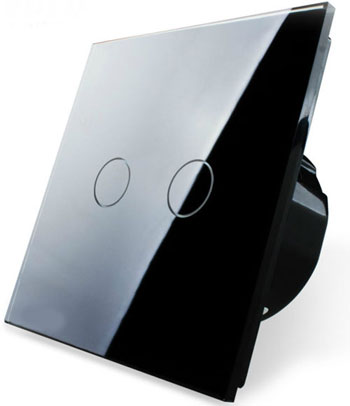
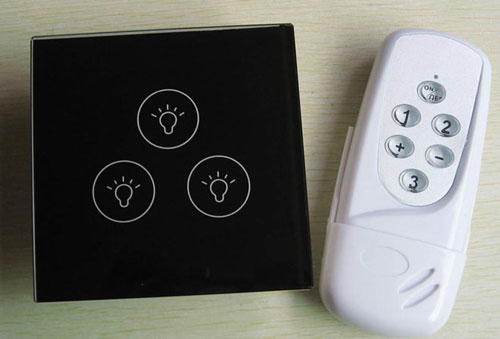
With remote control
Switches with a remote control are especially convenient in a home where children or people with disabilities live. Useful if the switch is located inconveniently or it is difficult for children to reach it. And they also give comfort when there is no desire to get out of bed to turn off the light or appliance, lower the curtains.
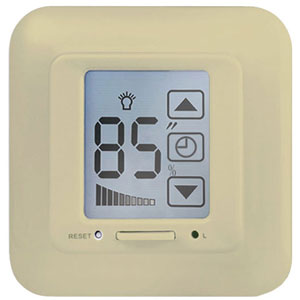
With timer
The timer allows you to turn on and off the device or light in a certain mode. Timer switches are universal. They are easy to use, work with any type of lamp: LED, halogen or incandescent.
Their advantage is safety. If a short circuit occurs, the circuit breaker will automatically switch to the off position.
The switches are equipped with indicators that show whether it is currently on. And users also note ease of installation, ease of use, attractive appearance, reliability.
A switch with a timer is suitable if you want to regulate the time of its operation. This can be convenient when you need to program an electrical appliance to turn on or off. These switches help you save energy.
Device Selection Criteria
When choosing a switch, pay attention to the following points:
- how many devices can be connected to one device. Optimal 1-3.More than three - inconvenience in use;
- is the switch equipped with a dimmer - a device for adjusting the intensity of lighting;
- the presence of a timer;
- possibility of remote control.
Important! Pay attention to the mains voltage. It must comply with the requirements specified in the instructions for the switch. This will ensure correct operation and extend the service life.
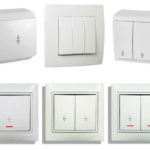
The body of the switch can be made of plastic or glass. The second option will cost more. A variety of models and firms in the electrical market will help you choose a switch that suits the interior of the apartment, according to your taste preferences.
Advantages and disadvantages
Advantages of touch switches:
- universal - suitable for various types of electrical appliances;
- safe, resistant to moisture and damage. They work even when touched with wet hands;
- easy to install - can be put in place of the old switch;
- reliable and have a longer service life than conventional switches;
- silent;
- help save energy;
- have the possibility of remote control;
- stylish look.
The disadvantages include the price. The cost of one switch starts from 900 rubles.
Rules and connection schemes
Installing touch switches is no more difficult than installing conventional keyboards. When starting installation, remember the safety precautions, and if you are not confident in your abilities, use the help of a specialist.
Network connection diagram
Connecting a touch switch is similar to connecting a conventional one. It can be installed in the same place. To do this, follow these six steps in sequence:
- de-energize the network;
- dismantle the old switch;
- remove the top panel from the new switch;
- connect the wires to the terminals intended for them;
- put the mechanism in the mounting box and secure;
- fix the panel.
Wiring diagram for walk-through touch switches
The connection diagram is similar to connecting any touch switch. The difference is that for the correct operation of several pass-through switches, they need to be synchronized with each other.
Attention! The pass switch function only works after synchronization. Without synchronization, they work like normal switches.
To synchronize the switches, touch the sensor of each switch in turn (first, second, third, etc.), hold for 4-5 seconds.
To reset synchronization, it is necessary to stay on the sensor of the last switch until a sound signal appears (about 10 seconds).
Wiring diagram for impulse touch switches
The impulse switch is in the "on" state only at the moment the button is pressed and held. Most often, this is a doorbell, or a button to raise the blinds. Installation takes place according to the standard scheme. It usually has two terminals and is designed for one load line.
Attention! Before buying, carefully check the package. It is possible that the bell, blind motor or relay will have to be purchased separately.
Wiring diagram for touch switches with current stabilizer 12V
Between the device and the switch there must be an inrush current stabilizer and an LED adapter. Such a scheme is used if the devices, when turned on, consume current ten times higher than the rated one. For example, the extractor motor.
Mounting errors
To avoid errors when installing switches, observe the following rules:
- Before installation, always turn off the power to prevent short circuit and damage to the device.
- Install and remove the glass front panel on a de-energized mechanism.
- Make sure that the front panel does not rest on one side of the wall and is strictly parallel.
- Apply power to the touch switches when each line is under load.
- Put the front glass panel on the switch immediately after installation so that the sensor does not collect dust.
- Do not press the sensor without the panel!
- If there is construction dust on the switch sensor, wipe it with a dry, clean cloth.
- Be careful when working with electricity.
Now you know about the advantages of touch switches, the principles of their design and connection. Modern switches will make your home stylish and comfortable, and if properly installed and handled, will delight you for many years.
Similar articles: