Satellite TV over the past few years is not a luxury for most people in the Russian Federation. That is why it is popular not only in big cities, but also in villages quite remote from them. In order to have a good signal and a high-quality picture, it is very important to understand how to properly install a satellite dish and set it up.
Content
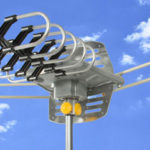
Choosing a place to install a satellite dish
In order for the satellite signal to be strong and of high quality, there should be no obstacles in its path. That is why experts advise installing the antenna precisely in those places near which there are no trees, other buildings, billboards, etc.
There are also some other factors to consider, such as:
- proximity to the TV;
- availability for the owner.
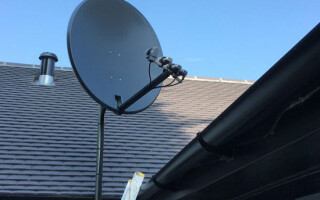
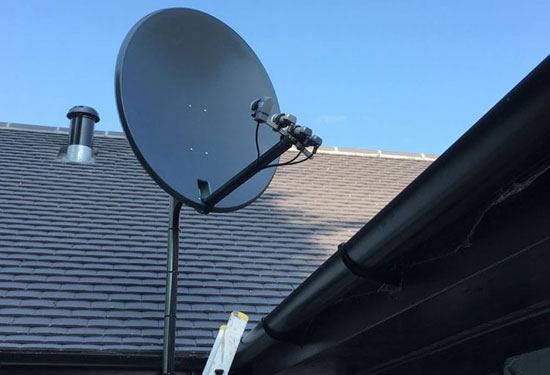
If the satellite dish is close to the TV in a human-accessible place, it will be fairly easy to install and set up. The roof of the house is best suited for installation. Despite this, the antenna can be mounted on a balcony or on the facade of a building. Experts do not recommend installing it inside glazed balconies and in places where heavy precipitation is possible on the structure: rainwater and snow.
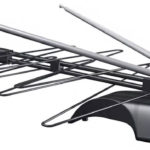
Assembling the antenna

The antenna assembly process must be carried out in full accordance with its operating instructions. During this process, it is very important to handle the mirror carefully and as carefully as possible. In no case should you inflict any mechanical damage on it that can change its geometry. First of all, this applies to mirrors that are made of aluminum. After assembling the antenna, it is imperative to check the tightness of all fasteners without exception.
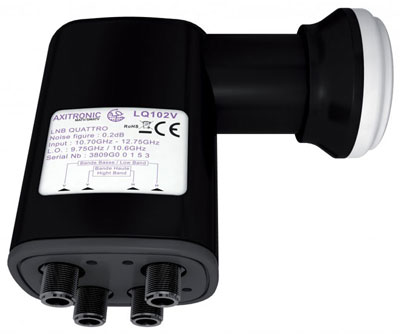
The most important point of assembly is the installation of a satellite converter (LNB – low-noise block downconverter). The correctness of its polarization directly affects the quality of the signal that the antenna will eventually receive. In order to increase it, it is necessary to experimentally carry out manual adjustment of the heads around their axis. In the most advantageous position, the converter must eventually be fixed.
Note! If after installing the antenna it is impossible to adjust the converter, this process must be done in advance. Some additional information about the assembly can be obtained from the seller of the fixture.
Before the installation process, experts recommend tying the antenna to safety cables. In this way, it can be prevented from accidentally falling from a height.
Bracket and Antenna Installation
In order to install the bracket, you will need a puncher or a special percussion mechanism designed for drilling holes in brick or concrete.

Experts recommend installing the bracket antennas on anchor bolts with wedging function. When the bolt is tightened inside the wall, its petals diverge in all directions. In this way, it is possible to create a truly reliable mount.
Be sure to pay attention to the following features of the installation of the bracket:
- If the walls are made of brick, anchor bolts are best M8 or H10.
- When working with brick walls, it is better not to use anchor bolts with a diameter of more than 16 millimeters.
- If the structure is made of high-strength old brick, it is allowed to use anchor bolts for holes with a diameter of more than 20 millimeters.
- Around the hole for the bolts, experts recommend leaving most of the brick, since the fasteners are held rather poorly in the solution.
- It is not necessary to install the bracket closer than the length of 4 bricks to the corner of the building and the height of 4 bricks to the roof of the structure. This may lead to the formation of cracks.
- It is not recommended to use anchor bolts to mount the antenna on walls made of cinder block or low density blocks.
- Overtightening the anchor bolts can generate a high compressive force, often leading to partial failure of the brick.
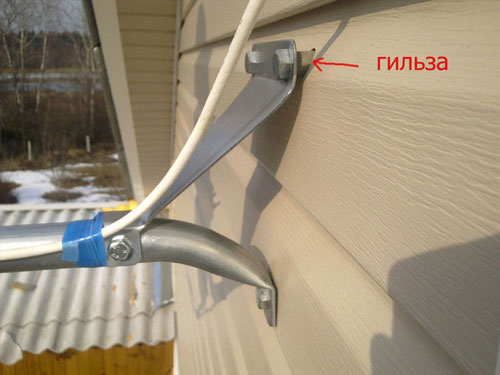
To install the bracket, it is necessary to mark the wall. After that, you need to drill in the appropriate places. Next, stretch the anchor bolts along with the bracket. They must be tightened to the stop. At the end, you need to check the fasteners for strength.
Cable installation
Before installation cable, you need to choose a place where you can make a hole for it. If the antenna will hang on the facade of the building, drilling is recommended to be done in the following parts of the wall:
- in the corner of the window frame;
- in the wall at floor level.
If the antenna is on the roof, cable must be drawn along the facade of the building. It must be fixed both on the roof and near the window on the wall through the window frame. It is also allowed to run the cable through the low-current risers of the structure.
F-connector connection
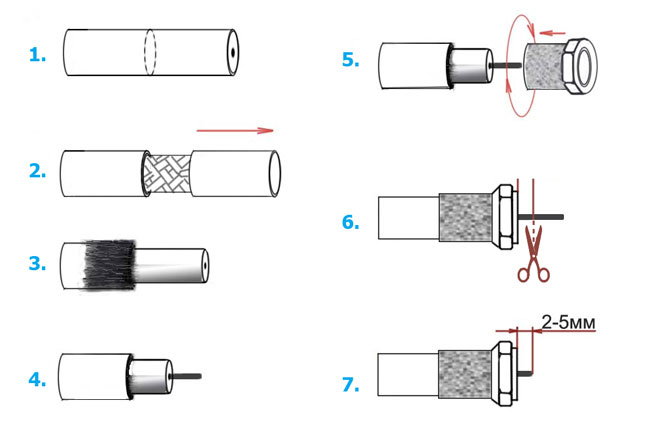
In order to connect coaxial cables, they must be stripped. After that you need to wear F-connectors. This happens in the following order:
- cutting off the outer sheath of the cable at a distance 2 cm without screen damage;
- accurate bending of the wire onto the sheath;
- removal of insulation from the central core protruding from the screen on 2 mm;
- winding the F-connector;
- shortening the excess supply of the central core, leaving 2-5 mm from the cutting plane.
The described method of connecting the F-connector is the simplest.
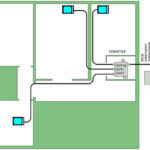
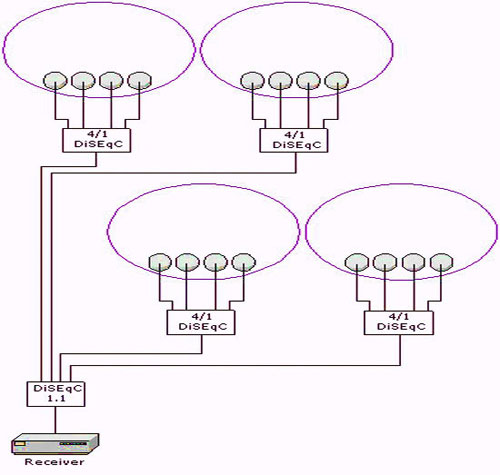
Multiswitch connection diagrams
The choice of a multiswitch should be based on two important factors: the number of cables and the number of TVs in the house. The most commonly used basic schemes for connecting these devices:
- For satellite Amos 2/3 4.0w you only need 1 SAT cable.Reception of TV channels: horizontal polarization (H) and lower range (Low) – multiswitch input H, Low.
- For satellite Astra 5.0E You need 2 SAT cables. Reception of TV channels: horizontal polarization (H) and upper range (High) - multiswitch input H, High, vertical polarization (V) and upper range (High) - multiswitch input V, High.
- For satellite Eutelsat 36.0E, which has NTV + channels, you need 2 SAT cables. Reception of TV channels: horizontal polarization (H) and upper range (High) - multiswitch input H, High, vertical polarization (V) and upper range (High) - multiswitch input V, High.
- For satellite Eutelsat 36.0E, which has Tricolor TV channels, you need 1 SAT cable. Reception of TV channels: horizontal polarization (H) and upper range (High) – multiswitch input H, High.
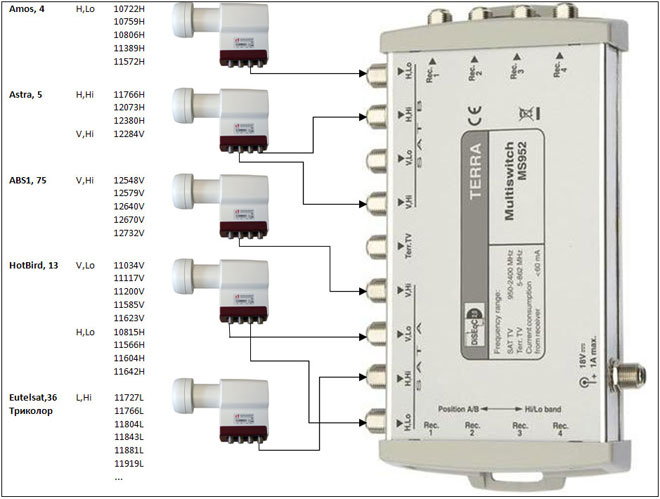
If a multiswitch is used, Diseqc no longer required.
How to collect multifeed
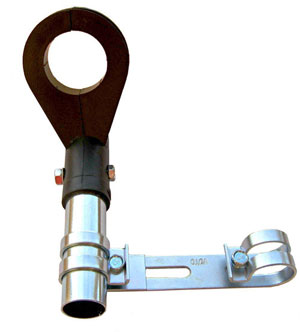
A collapsible multifeed kit often comes with two ears of different sizes. The smaller one needs to be put on the plastic tube. In turn, the large one must be fixed to the central traverse. Relative to each other, the ears can be located in different ways: both at the same level and in different planes. The first way is more common. The second one facilitates the initial setup and saves time when searching for additional satellites. This option should be used in cases where different heads will catch the signal of several satellite devices.
The third head should be placed on the same plane as one of the previous ones. The difference between different converters depends, among other things, on the diameter of the mirror.The smaller it is, the closer the heads should be to each other.
After screwing the strap, you need to pay attention to the angle between the axis of the plastic and the attachment to the traverse. It should be around 90 degrees.
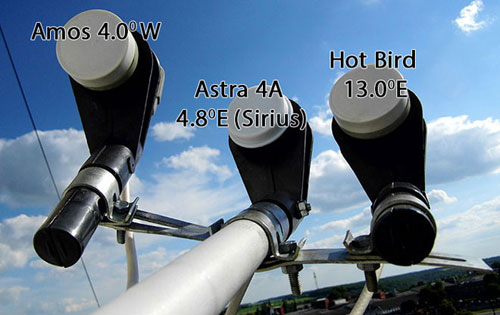
In addition, it is necessary to take into account the fact that the multifeed closest to the dish should be exactly the one that is configured to receive a signal from the closest satellite.
DiSEqC connection
If available DiSEqC (Digital Satellite Equipment Control - dysek or disk), antenna tuning should be carried out in the following sequence of actions:
- connecting cables to the heads;
- setting heads on DiSEqC.
If any satellite on the receiver is set to 1 port, then on DiSEqC it must be in the appropriate place. The central single connector is for tuner output.
Antenna and converter angle adjustment
Adjustment must begin with the central head. The plate should be at the same time exposed with a slight rise in relation to the horizon. Next, you need to turn on the tuner, select a satellite from the central converter and start searching for a signal from the head. To do this, just lower and turn the antenna itself.
The signal quality will be displayed on the TV as a percentage bar. They should be as large as possible - approximately in the area 68-80%. To do this, the plate must be slowly turned in different directions. Without covering the mirror. After finding the ideal position, the antenna must be fixed.
If the antenna is horizontally and vertically adjusted correctly, you need to start adjusting the central converter.To do this, it should be slowly scrolled to one side or the other, thus increasing the signal quality by several percent.
The angle of rotation of additional heads is adjustable independently of the central one. Their direction can be completely different - depending on where the satellite is located, whose signal they catch.
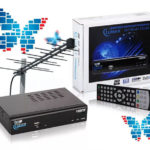
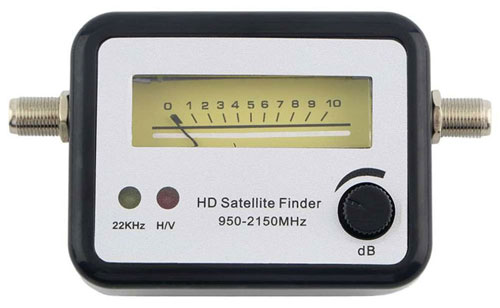
Satellite dish tuner
In order to facilitate the process of adjusting the angles of rotation of the antenna and the converter, you can use a special device made in China. There are several models of such devices. The most popular of them is Satfinder Find Meter LNB Dish DirecTV.
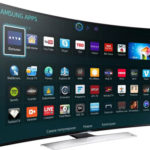
How to set up a TV?
The easiest step in installing a satellite dish is setting up the TV. To do this, you need to test the available channels. In most cases, they line up in an arbitrary sequence. This is primarily affected by the frequency of broadcasting.
The TV can be adjusted using the remote control. Every channel needs to be reviewed. If problems are found, the equipment should be further adjusted.
Search for satellite and channels
Using the receiver, you can search for satellite and channels without additional equipment. To do this, it is necessary to move the tuner and a small television. Instead, you can find an assistant who will monitor the signal quality in the room.
Common installation and connection errors
If you install and connect a satellite dish yourself, the following errors may occur:
- insufficient mirror size;
- incorrect selection of polarization;
- lack of a protective cover;
- using the wrong cable;
- poor-quality crimping at the joints.
If the above problems did not arise during installation, the plate will eventually work as efficiently and reliably as possible.
Similar articles: