Due to its electric or magnetic waves, a metal detector, or as it is also called a metal detector, is able to distinguish and respond to metal objects hidden in another environment. This device is an indispensable assistant for the inspection service, ecologists, builders, for "gold miners" and many other specialties. The average price of a metal detector in the Russian Federation varies from 15-60 thousand rubles. This article is designed for those who do not want to overpay, want to figure out the device on their own, and make a metal detector with their own hands.
Content
Metal detector, its device and principle of operation
The principle of operation of a metal detector is complicated only in words.Its essence lies in the formation of magnetic fields with the help of electrical voltage, when these same waves meet metal objects on their way, the device emits a signal, notifying about the find. For beginners who have not yet encountered such “inventions”, this seems quite difficult, but if you carefully follow the instructions, in reality everything will turn out to be much easier. And with a little understanding, it will be possible to easily create a device to find an old coin at a depth of 30 cm underground.
Coil
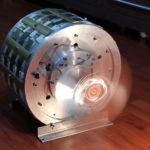
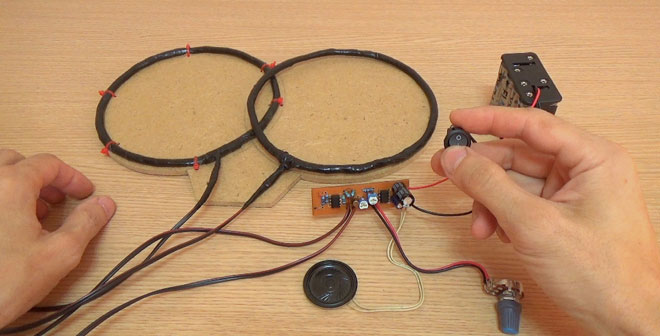
In order to create a magnetic field, it is necessary that the current pass through the riot (bundle, winding) copper wire with nylon insulation. It is wound on a plastic coil several times. Then wrapped with polyester, strong packing tape. This is necessary so that the wire cannot unwind back. If inside the bobbin (special coil) place pure iron, the magnetic field will increase significantly, this method is usually used for security metal detectors.
Electronic circuit
The operation of the system is completely dependent on the electronic circuit, this is the brain of the device. The remaining piece of copper wire is soldered to the printed circuit board, the other output of the board is connected by electrical wiring to sensors: LEDs, vibrators, speakers. In the event of a collision of magnetic waves with metal, an electrical signal will be sent from the coil to the indicators through the board. Perhaps this is the most difficult part of creating a device with your own hands. Then the device is calibrated, adjusted, placed in a plastic protective case.
main parameters
According to their properties, metal detectors are divided into 3 main groups: deep, underwater, ground. By the name it is immediately clear what their features are.Although often, hybrids are created, for example, in soil - a waterproof coil with a body. Naturally, these will cost much more. To make a metal detector yourself, you need to clearly understand for what purposes it will be used, based on this, there are general parameters of the device:
- Depth of action underground, each device has its own "penetrating ability". Of course, this also depends on the density, the type of soil, the presence of stones in it, but this is already secondary.
- The diameter of the search zone, you must immediately determine for yourself which range will be optimal, and start from this when choosing or assembling a metal detector.
- Sensitivity by metal instrument. Here the question arises, for what purpose the apparatus will be used: for treasure hunters, a trifle will only interfere, but for hunters for lost jewelry on the beach, it is important not to miss anything, even the smallest trifle.
- metal selectivity. There are devices that react only to certain precious alloys.
- Power and energy saving, a standard feature of any wireless device.
- Completely new models have such a feature as "discrimination", which allows you to display the approximate depth, location, metal alloy on the display of the device.
Depth of detection
On average, the search depth of a metal detector is from 1 to 100 centimeters. Different models have different accuracy and depth of action. Basically, the range of visibility depends on the size of the coil, the larger it is, the deeper you can look.And the very first mistake of most beginners, not knowing why, not knowing why, they choose a metal detector with the greatest depth of research. On average, ancient coins are buried 30-35 centimeters, and lost precious jewelry is even closer to the surface. In addition, the greater the depth, the greater the errors and errors. You can dig 10 holes with a depth of 1 meter, in the same time you can really find something valuable practically on the surface, without bothering at all.
Operating frequency
Like any device, a metal detector has an interconnection of its components. Using the device at full capacity, you increase the energy consumption of the battery. If we consider the metal detector as a whole, we can conclude that all its component dimensions and functionality depend on the frequency of the generator. This is perhaps the most important evaluation criterion by which they are classified:
- The first option is completely non-amateur - ultra-low-frequency. Without some computer support, it will not be able to work. Following the coil, a special machine must follow, which will not only process the signal to the operator, but also supply a charge, due to the considerable energy consumption. Its range is less than 100 Hz.
- The second option is also not a simple household appliance - low-frequency. The range varies from 100 Hz to 10 kHz. It also requires high energy consumption, mainly designed to search for ferrous metals up to 5 meters deep. It requires computer signal processing, but even with its help, it has a large error in recognizing the alloy and its volume at great depths.
- Universal, more complex, compact - high-frequency metal detectors.With the help of such a device, you can find metal 1.5 meters deep. It has an average noise immunity, but good sensitivity, at a shallow depth, it is possible to determine the alloy and dimensions of the metal, with fairly good accuracy. It has a range up to 30 kHz.
- RF metal detectors, everyone has probably seen them, a standard device suitable for aspiring amateurs. It has excellent discrimination with a depth of up to 0.5 meters. If the soil does not have magnetic properties, such as sand, or there is no radio or television station nearby, then this is just an excellent universal device. Its energy consumption is very small compared to the representatives above. And its full effectiveness will also depend on its components, largely on the coil.
Do-it-yourself metal detector assembly
There are a large number of diagrams, videos, forums, tips on assembling a metal detector on the Internet. And among the many reviews, there are many negative ones about the device of our own production. Many write that they didn’t succeed, that it doesn’t work, that it’s better to buy than to spend a lot of time ... It’s very simple to answer such comments: if you set a goal and take the issue seriously, then making your own hands will turn out to be much better than factory metal detectors. If you want to do something well, do it yourself.
Is it possible to make a metal detector with your own hands?
For a person who, at least at the school level, knows and is interested in physics and electronics, such a task will not be difficult. And the matter will remain only for the selection of high-quality materials.But beginners should not retreat either, step by step, following the instructions, adding a little perseverance, everything will certainly work out.
Self-manufacturing of a printed circuit board
The most difficult stage in the assembly of the detector is the manufacture of the printed circuit board. Since this is the brain of the whole structure, and without it, the device simply will not work. For starters, let's take the simplest manufacturing technology - laser-ironing.
- Initially, we need a scheme, of course, there are a huge number of them on the Internet. But if a person set out to do everything himself, a special Sprint-Layout program will come to the rescue, which will help you develop it.
And so, having a ready-made schematic drawing of the board, we print it using a laser printer, this is important, on photographic paper. Many people recommend using a light weight paper to better show the details. - It will not be difficult to purchase a piece of textolite, it will not be difficult to find it, and prepare it properly:
1) We cut out with scissors for metal (or a knife for metal) from a piece of textolite a blank according to the dimensions and parameters we need, the corresponding printouts.
2) Then you need to thoroughly clean the workpiece from the top layer using sandpaper. The ideal result is a uniform mirror shine.
3) Wet a piece of cloth in alcohol, acetone, or other solvent, and wipe thoroughly. This is required in order to degrease and clean our blank material. - After the performed procedures, we place photographic paper with a printed circuit on the textolite, and smooth it with a hot iron so that the pattern is translated. Then you should slowly immerse the workpiece in warm water, and very carefully and carefully, without lubricating the pattern, remove the paper.But even if the contour is a little smeared, it doesn’t matter, you can correct it with a needle.
- When the board dries a little, the next stage comes, for which we need a solution of copper sulfate or ferric chloride.
To prepare this solution, you need to purchase ferric chloride powder (FeCl3). In the radio shop, it costs quite a penny. We dilute this powder with water, in a ratio of 1 to 3. The water should not be hot, and the dishes should not be made of metal.
We immerse our board in the solution for a while, depending on the thickness of the material and external conditions, there is no specific time. If you stir the solution periodically, the process will go faster and better. - We take out the board, rinse it under running water, remove the toner with alcohol or any other solvent.
- Using a drill, we make holes for parts where they are needed according to the diagram.
More details about this method can be found in our article: How to make an electronic printed circuit board at home.
Mounting radio components on the board
At this stage, it is required to supply the board with all the necessary radio components. Do not be afraid of complex names, unknown combinations of numbers and letters. All details are signed. You just need to find the right ones, buy them, mount them in their place.
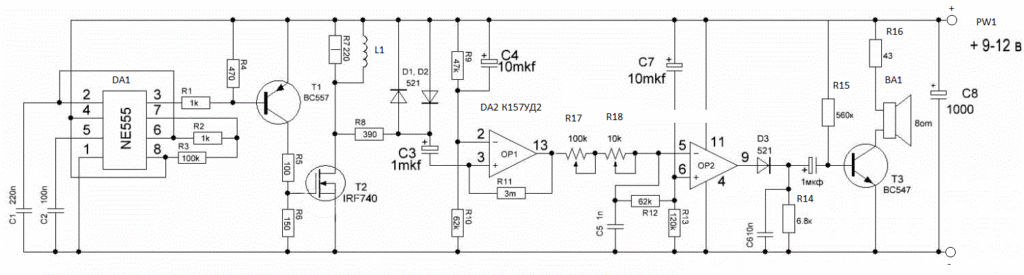
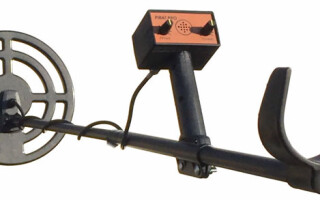
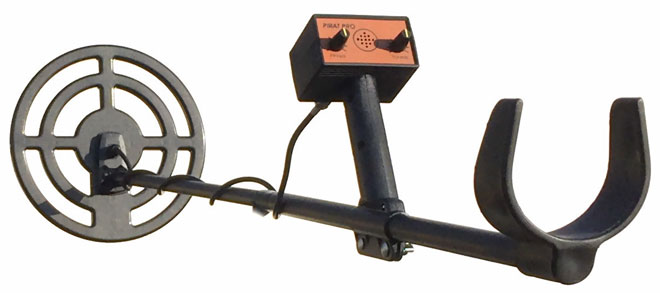
Here is an example of a fairly simple, but effective scheme to use - PIRATE
So, let's begin:
- As the main microcircuit, it is quite possible to take an inexpensive KR1006VI1, or its various foreign counterparts, for example, NE555, it is used in the diagram provided above. To install the circuit on the board, you need to solder the jumper between them.
- The next step is to install an amplifier, for example, K157UD2, which is also indicated in the diagram above. By the way, rummaging through old Soviet devices you can find this and many other details.
- Then we install two SMD components (they look like small bricks) and mount the MLT C2-23 resistor.
- By installing a resistor, you need to stop two transistors. A very important point for beginners: the structure of the first must correspond to NPN, and the other to PNP. BC 557 and BC 547 are ideal for this device, but since they are not so easy to find, various foreign analogues can be used. But the field-effect transistor is well suited for IRF - 740, or any other with the same parameters, in this case it does not matter.
- The last step will be the installation of capacitors. And immediately advice: it is best to choose with the lowest TKE value, this significantly improves thermoregulation.
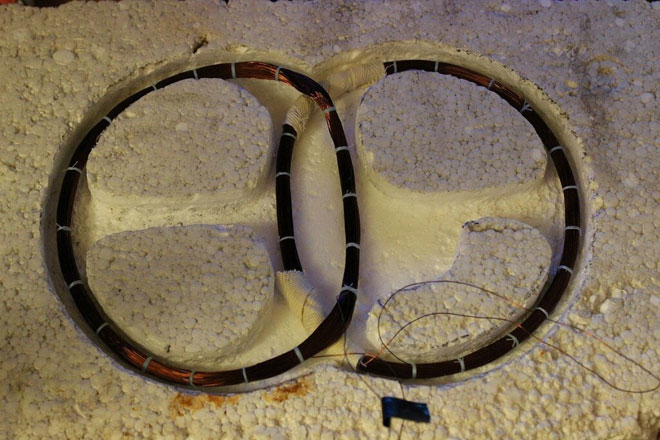
Coil making
As mentioned earlier, when making a homemade coil, it is necessary to wind approximately 25-30 turns of PEV wire if its diameter is 0.5 millimeters. But best of all, when testing the device in practice, select and change the number of turns to achieve the desired result.
Frame and accessories
To recognize the find of the device, you can use any speaker with a resistance of zero ohms. As a power supply, you can use a battery or simple batteries with a total voltage of more than 13 volts. For greater stability and electrical balance of the circuit, a stabilizer is mounted at the output. For a pirate circuit, the ideal voltage type would be L7812.
After making sure that the metal detector works, we turn on the imagination and create a frame that will be, first of all, convenient for the operator.There are some practical tips for creating a case:
- The board must be protected by placing it in a special box, firmly fixing it in a stationary state. We place the box itself on the frame for convenience.
- When creating a case, one point must be taken into account: the more metal objects will be present in the structure, the less sensitive the device will become.
- To provide the device with all sorts of amenities, such as an armrest, you can use a piece of sawn water pipe in half. Attach a rubber grip below. And on the very top to build some kind of additional holder.
Schemes of the most popular metal detectors
Butterfly scheme

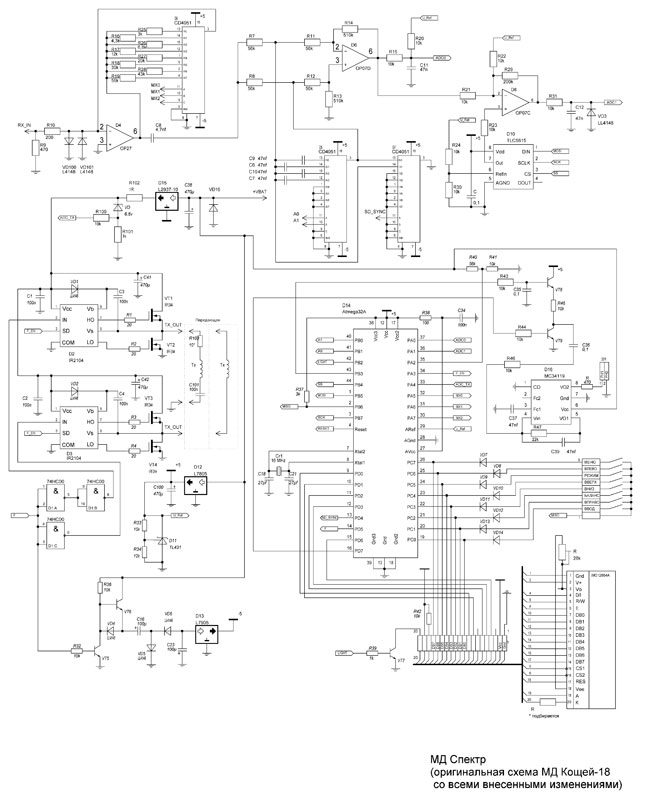
Scheme of Koschey
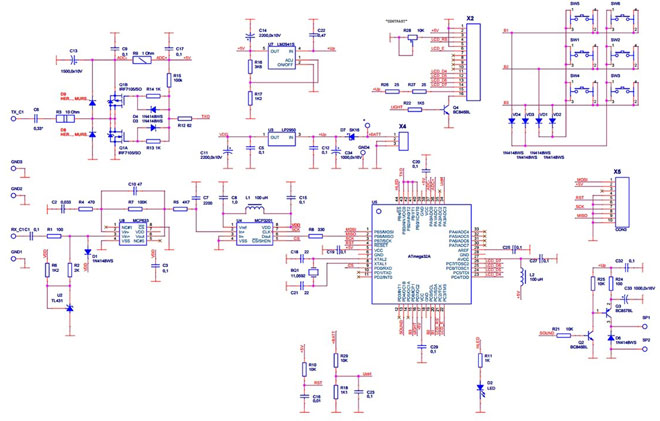
Schematic Quasar
Scheme Chance