A windmill does not need fuel or solar energy to generate electricity. This feature makes many people think about how to build a wind turbine with their own hands, because the purchase and installation of finished equipment is expensive.
Content
The principle of operation and types of wind generator
You can make a windmill on your own only with an understanding of its device. The prototype of this unit is an old windmill. With the pressure of air flows on its wings, a shaft came into motion, which transmitted the torque to the mill equipment.
In wind turbines for the production of electricity, the same principle of using wind energy to rotate the rotor is applied:
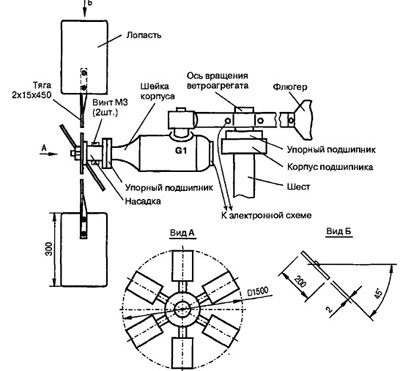
- The movement of the blades when exposed to wind causes the input shaft with the gearbox to rotate. The torque is transmitted to the secondary shaft (rotor) of the generator, equipped with 12 magnets.As a result of its rotation, an alternating current arises in the stator ring.
- This kind of electricity cannot charge batteries without a special device - a controller (rectifier). The device converts alternating current into direct current, allowing it to be stored so that household appliances can work without interruption. The controller also performs another function: it stops charging the battery in time, and the excess energy generated by the windmill is transferred to units that consume a large amount of it (for example, to heating elements for heating a house)
- To provide a voltage supply of 220 V, the current is supplied from the batteries to the inverter, and then it goes to the points of electricity consumption.
To ensure that the blades are always in the best position to interact with the wind, a tail is installed on the impeller devices, which allows you to turn the propeller towards the wind. Factory models of windmills have braking devices or additional circuits for folding the tail or removing the blades from wind blows in adverse weather.
There are several types of wind turbines, classifying them by the number and material of the blades or the pitch of the propeller. But the main division occurs according to the location of the axis or input shaft:
- The horizontal type implies the location of the shaft parallel to the ground. Such generators are called vane generators.
- In vertical windmills, the axis is located perpendicular to the horizon, and the planes are located around it. Vertical generators can be called orthogonal or carousel.
Regardless of the location of the axis of rotation, the principle of operation of the unit remains the same.
Models of windmills can have a propeller or a wind wheel of 2, 3 or several blades.It is believed that multi-blade devices are capable of generating current in a small wind, and propellers with 2-3 wings require a greater air flow. When choosing a model, it is necessary to take into account the important rule that each blade creates resistance to the wind flow and reduces the rotation speed, so it is quite difficult to spin a multi-bladed wheel to operating speed.
Among the varieties of windmills there are sailing and rigid ones. These names refer to the material from which the wings are made. With self-assembly, the sail type will be simpler and more economical, but blades made of plastic material (fabric, films, etc.) are not durable and wear resistant.
Vertical option
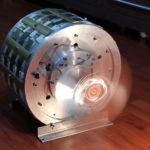
It is easier to make a vertical type wind generator than a horizontal one. The design does not require a vane device, it is located at a low height (up to 2 m). Reviews of those who use vertical wind turbines (wind power plant) indicate a slight noise during rotation and ease of maintenance of the working units of the units. The generator is located at the bottom of the structure and maintenance can be carried out without having to work at height or lower the mast to the ground.
A bearing is installed at the upper end of the axis, which simultaneously acts as a mast. This part requires virtually no maintenance and can serve for several years without repair.
Unlike a bladed windmill, vertical wind turbines do not require the installation of a high mast. They work regardless of the direction of the wind, which simplifies the design of the moving part.For the blades of a compact wind turbine, you can use a large diameter PVC pipe (for example, a sewer pipe), and thin galvanized steel is suitable for a more powerful wind turbine. These materials are available to any home craftsman and are relatively cheap.
The design of the wind wheel can be chosen independently from the many available options:
- Dornier design with 2 flat blades;
- Savonius system with 4 semi-cylindrical wings;
- orthogonal multi-bladed windmill with 2 rows of planes;
- helicoid wind turbines with curved blade profiles.
All vertical windmills use the principle of the Savonius aggregate. At home, blades can be made from steel or plastic barrels, cut in half lengthwise. The design feature is that the efficiency of the unit reaches a maximum at a blade speed 2 times less than the wind speed. Therefore, you should not try to increase the speed for a vertical wind turbine.
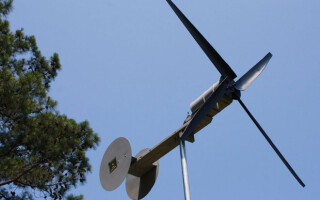
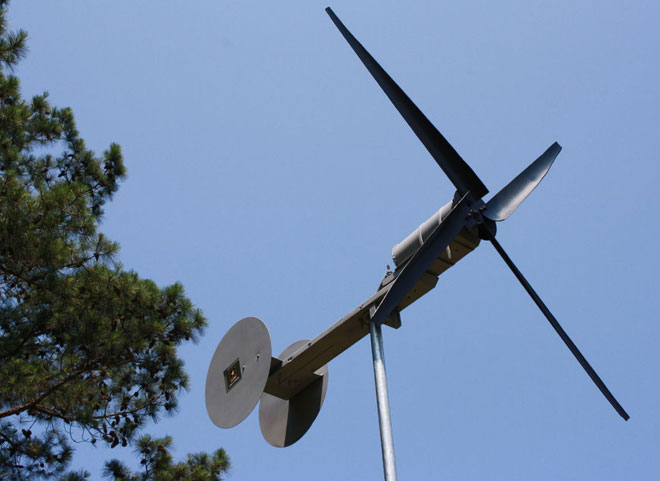
Horizontal Models
Unlike vertical generators, home-made wind turbines with a propeller have a higher efficiency with an increase in the speed of the blades. But numerous and narrow elements of the screw do not contribute to better work: with a strong wind pressure, they do not have time to spin the shaft due to the air cushion formed in front of the screw.
Do-it-yourself multi-bladed wind turbines for a home are best done in areas with not too strong winds. If the wind strength in the region often exceeds 10-15 m per second, it makes sense to build a wind turbine with 2-3 blades. Both types are able to start working at an air flow speed of about 2-3 m per second.
The horizontal model requires the installation of a high mast (6-12 m).To avoid high-altitude work during maintenance, craftsmen install the simplest folding mechanism - the axis - at the base of the mast. For the stability of the structure with a strong wind load, cable-stayed braces are required to hold the rack in a vertical position.
The nacelle with the generator and propeller must be mounted on a bearing and provided with a vane plumage so that the propeller always takes an advantageous position relative to the wind. Cables carrying current should be positioned so that they do not twist when the nacelle rotates, interfere with or break. Therefore, they are carried out inside a tubular mast.
How to make a 220V wind generator?
Work on the creation of a wind turbine should begin with determining the required power of the unit:
- to illuminate several rooms, it is enough to have a generator with a power of less than 1 kW; it will provide power to incandescent or energy-saving lamps, and in addition it will be possible to turn on a laptop or TV to the network;
- a home-made wind generator with a capacity of 5 kW will provide electricity to household appliances (refrigerator, washing machine, stove, etc.);
- in order to completely transfer the house to an autonomous supply of electricity, you need a powerful generator with a capacity of more than 20 kW.
You can make the generator yourself or adapt the corresponding assembly removed from the old car. In this way, it is possible to ensure the production of current up to 2-3 kW. To make a more powerful 220V do-it-yourself wind generator, you will need to accurately calculate the number of coils and turns of wire, the size and number of magnets on the rotor, and the parameters of the blade wings.
Simple design
For the simplest design with a power of about 1-1.5 kW, you will need:
- car generator (12 V);
- acid battery (12 V);
- switch-button (12 V);
- current converter 700-1500 V and 12-220 V;
- metal large capacity;
- bolts, washers, nuts;
- clamps for fastening the generator (2 pcs.).
In the pulley of the automobile generator, you need to make symmetrical holes for the bolts. Divide the circumference of the container into 4 equal parts. Cut blades:
- on the side of the container, mark the rectangles according to the markings for dividing the circle;
- find the vertical middle of each element;
- mark the top and bottom of the container with solid rims 3-5 cm wide;
- cut the metal between individual rectangles to the line of the rims;
- make cuts along the upper and lower borders of the markup so that the middle of the rectangle remains intact and connected to the rims;
- deploy each blade relative to the central axis;
- determine the center of the round bottom, mark the locations of the bolt holes in accordance with their location on the generator pulley.
When deploying the wings, it is worth determining the direction of rotation of the wind wheel in order to bring out the necessary parts of the planes. To ensure the same load on all the blades, their angles of rotation should be measured.
The assembly of the structure consists in bolting the generator pulley and the bottom of the tank. After that, a base is prepared for the installation of a wind generator (a mast made of a thick pipe about 2 m high). It is easiest to attach the generator to it with clamps of the appropriate diameter. To charge the battery, the current from the generator must be passed through the rectifier, the connection must be made using the car's electrical circuits.
Homemade generator for a bladed wind turbine
The unit for a horizontal wind generator can be assembled from wheel hubs from a car or an electric motor from a washing machine can be used. To work, you will need to purchase magnets made of neodymium (niobium alloy). It is better to take rectangular elements.
You can determine their number by the number of coils, if an engine is used. For a three-phase generator, the number of magnets should be 2/3 of the number of coils, and for a single-phase generator, it should correspond to it. Master practitioners advise opting for a three-phase generator.
When using a motor from a washing machine, magnets must be glued to the motor rotor. If a wheel hub is used, the magnets are placed on a circle of sheet steel about 5 mm thick. When assembling the rotor, follow the rules:
- The distance between the magnets must be the same. Rectangular elements on the hub have long sides along the radii of the circle, and on the motor shaft - along its longitudinal axis.
- Before work, you need to determine and mark the poles of the magnets. They are installed so that the opposite elements have different polarities. When placing magnets, alternate the positive and negative poles of adjacent parts.
- To keep the magnets firmly on the surface of the rotor, it is recommended to fill them with epoxy.
When using the motor shaft as a rotor, the part is installed in its place in the winding and the operability of the structure is checked by applying voltmeter probes to the wire leads and rotating the shaft with a drill.
If a hub is used, then coils are wound independently from enameled copper wire with a cross section of 1 mm.Each coil should consist of 60 turns and have a height of 9 mm. Coils should be mounted on the flat part of the wheel hub.
For a three-phase generator, connect the ends of the wires like this:
- leave the outer terminal 1 of the coil free, and the inner one - connect to the outer one by 4;
- connect the inner wiring of 4 coils with the outer one at 7 and continue to the end, connecting the winding parts every 2 pieces; on the latter, a free inner end should remain, which is easily twisted with the output already left or marked differently;
- repeat the process with 2 coils, connecting the wires according to the same principle every 2 elements;
- do the same with 3 coils and the remaining unconnected.
At the end of the work, the master will have 6 separate pins. The winding must be filled with epoxy and dried.
Then, in the hub bearing, you need to clamp the shaft, on which to put the rotor ring with magnets. The gap between the planes of the parts is 1-1.5 mm. Check the presence of current at the terminals, assemble the windmill and install it on the mast.
Equipment service
During the operation of the windmill, once a month, it is necessary to carry out a general inspection of the fasteners, check the electrical system for voltage imbalance, the controller is in good condition, and the cables are evenly tensioned. For uninterrupted operation, once every 3-4 months, it is worth inspecting the battery terminal connections, checking the electrolyte and oil levels at the generator gearbox.
The annual inspection includes checking the surfaces of the blades, determining the performance of the bearings and replacing them. During these periods, the electrolyte level is also replenished, oil is added to the gearbox. Annual maintenance involves checking all nodes for operability.
Similar articles: